12 iPhone Photography Tips & Tricks

Do you want to take amazing images on iPhone that look like they were shot on a professional camera? No matter what model you own, this handy guide created by WeEdit.photos specialists will help you realize all your photo ideas for Instagram.
Peruse this article to find out untrivial tips, tricks, and little-known iPhone camera functions to produce amazing iPhone photography even if your level of expertise leaves a lot to be desired.
1. Adjust the Exposure Manually
Conveniently, iPhone defines the correct exposure depending on the focus. Choose the object you want to capture, tap on it, and then swipe up and down to tweak the exposure manually overriding automatic configurations.
Once the scene in the camera lens is changed, the device restores the default settings. Usually, this happens when you move a camera or the object in the focus changes its location.

The following gesture will allow you to stick to the current settings and keep the same focus throughout the entire photoshoot: tap the screen and hold your finger down for a while.
Then you should see the yellow box at the upper part of your screen notifying you that AE/AF LOCK is activated. By doing so you will save the required settings to shoot the same scene without the need to configure the parameters before every shutter button release.
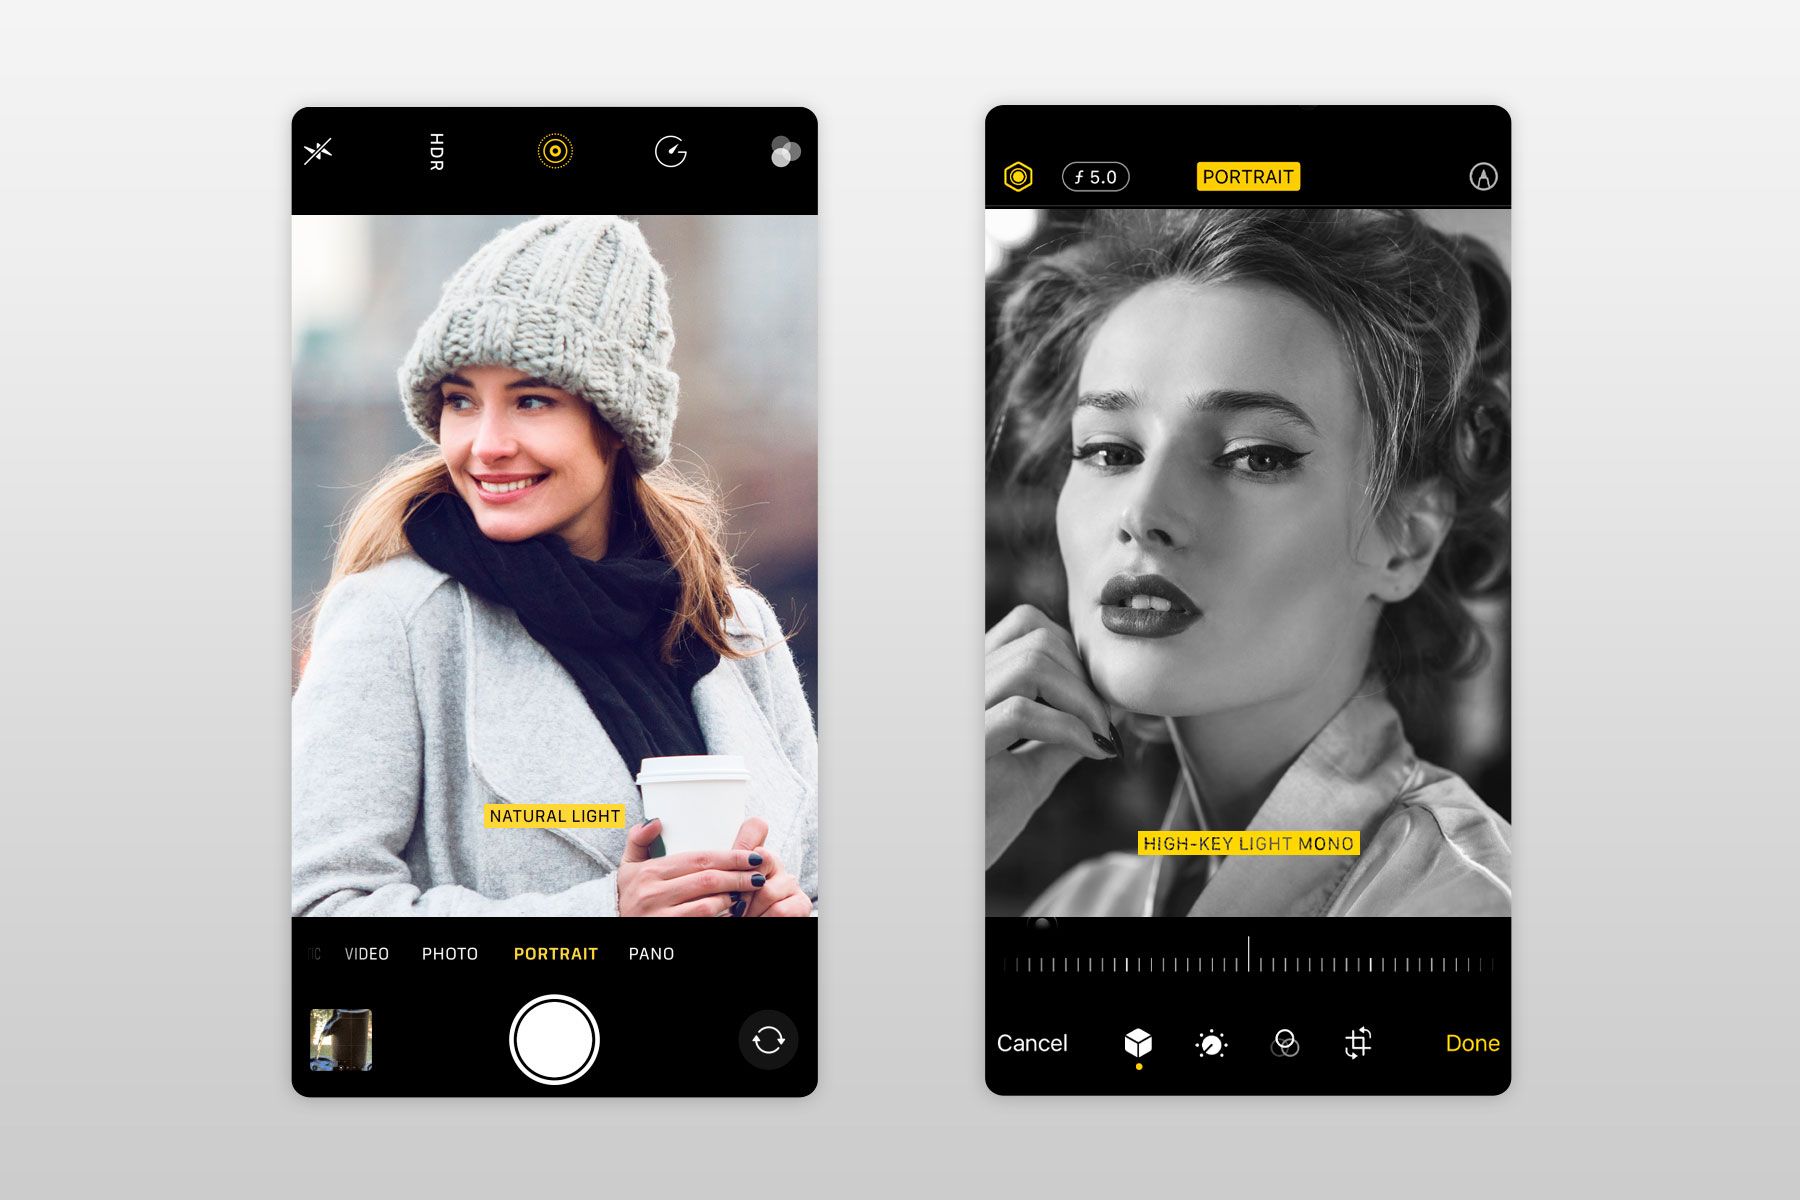
2. Experiment with iPhone Modes
When speaking about the iPhone camera app, note that there are several modes available, namely portrait, panorama, time-lapse, and slow-motion. Do not be afraid to tinker with them to take gorgeous and original shots.
Portrait mode: This mode eliminates the need of discovering how to add bokeh in Photoshop, as shooting using this setting, you will achieve a shallow depth of field effect to implement the most sophisticated portrait background ideas.
Panoramic mode: This mode is an absolute lifesaver for those who often shoot landscapes. It lets you capture ultra-wide scenes even if you do not have enough space to back up to get every detail into the frame.
Macro mode: Switch to this mode if you need to take close-up shots of tiny objects like bugs or flowers that are close to your iPhone’s camera lens.
Night mode: With night mode enabled, taking impressive pics even in dim spaces is not a problem at all.
4. Add Filters in Editing Apps
One of the most useful iPhone photography tips is to benefit from various iPhone photo editors, Android photo editors as well as a wealth of filters to highlight the subject or crop the image to frame the subject properly. Snapseed, Enlight, VSCO, and Darkroom, TouchRetouch are the most popular and functional apps for this aim.

If you do not have time to learn how to improve pics and want to get impressive images in an instant, address our professional photo editing services. The specialists can refine colors, remove blemishes, and perform various manipulations to produce original compositions.
They can also mimic the style of your favorite influencers, all at affordable photo editing prices.
6. Create High Contrast Photos with HDR Mode
HDR is an abbreviation for high dynamic range, which is the balance of light and dark in an image. Usually, iPhone cameras struggle to expose every necessary component when shooting scenes that feature plenty of detail. For instance, it can capture mesmerizing highlights of the sky leaving the foreground in shadow.

With HDR mode activated, your smartphone will take three pics at different exposure levels turning them into a single pic with perfect exposure. This mode is indispensable for those who are just learning how to take travel photos.
It will also come in handy when shooting still-life, as well as images with strong shadows or dim illumination. However, this mode is a bad choice for fast-moving scenes.
7. Clean Your Lens for Clarity
One of the most obvious iPhone photography tips is to keep your lens always clean. Such a minor detail can influence the result considerably.

Instead of blurry pics, you will get crisp and clear images with plenty of detail. Ideally, take a clean microfiber cloth and wipe off any dust particles before taking the next shot.
8. Shoot RAW
The good news is that your iPhone camera can take RAW images without problems. This is a real advantage as the camera of an average smartphone can only shoot JPG pictures.
However, working in the free VSCO and Lightroom apps, it is possible to change the format to DNG, which is a RAW file format that provides you with more control over editing.

Many photographers are sure that they need Mac for photo editing to process RAW pics, but you can easily perform this task on your phone.
With this purpose, go to Lightroom Mobile > choose the camera icon in the lower right part > clip JPG in the upper middle part of the window > toggle to DNG.
9. Find Leading Lines
Another useful piece of advice on how to take good pictures with iPhone is to incorporate straight lines into an image, making it easier to understand for viewers. They are well-known as leading lines, as they direct a person’s glance directly to the point of interest.

By dividing your pic into distinct parts, these photo elements make your shots more visually appealing. For example, leading lines that go from the edge of the frame to the center of focus can add some depth to your image. This trick is very popular among famous portrait photographers.
10. Experiment with Perspective
Experimenting with perspectives definitely results in original and eye-catching compositions. However, most novice shooters prefer taking pics from a chest level neglecting all advantages of other angles. Do not hesitate to squat or get high to take an amazing shot.

To achieve a lower angle, try to turn your phone upside down to get extra few inches. By doing so you will position a camera as close to the ground as possible.
11. Freeze the Motion with Burst Mode
Using a burst mode is another great way to take stunning iPhone photography. When it is turned on, a camera takes ten pics per second, so the chances to shoot a perfect pic even of fast-moving objects increase in progression.

The owners of iPhone XS, iPhone XR, iPhone 11, or iPhone 12 should slide that shutter button to the left to activate this mode.
The device will continue to take pictures until you remove a finger from a shutter release. In case you shoot using iPhone X or older models, keep the shutter button activated to conduct a photo session in the burst mode.
12. Try External Lenses
If you really want to take pro-level iPhone photos, you cannot go without external lenses. They allow changing the field of view achieving more original and high-quality results.
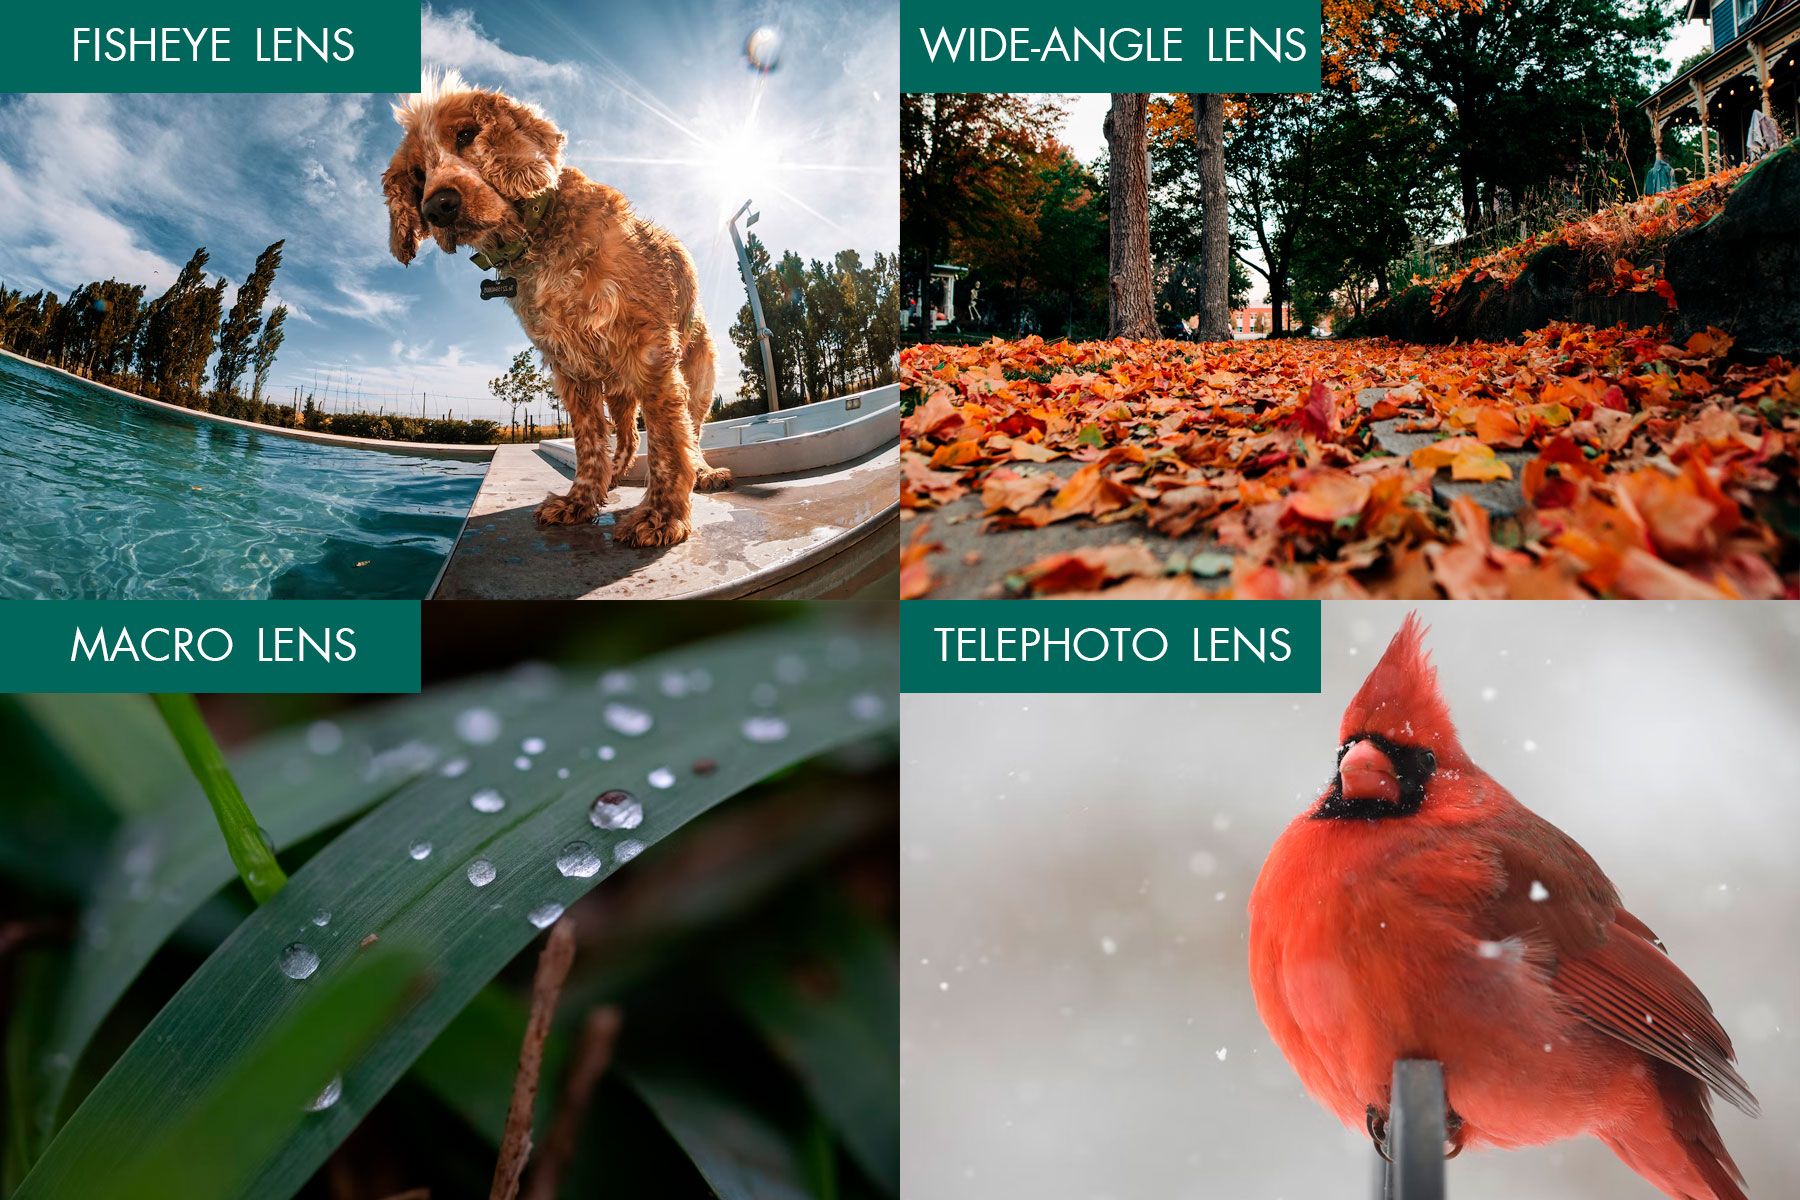
Nowadays the market offers a great variety of lenses for every budget including fisheye lenses for a distorted wide-angle effect, macro lenses, and telephoto lenses. I recommend checking KEYWING Phone Camera Lens 3 in 1 Phone Lens Kit, as this is one of the worthiest options.