How to Edit Food Photos in Photoshop in 8 Steps
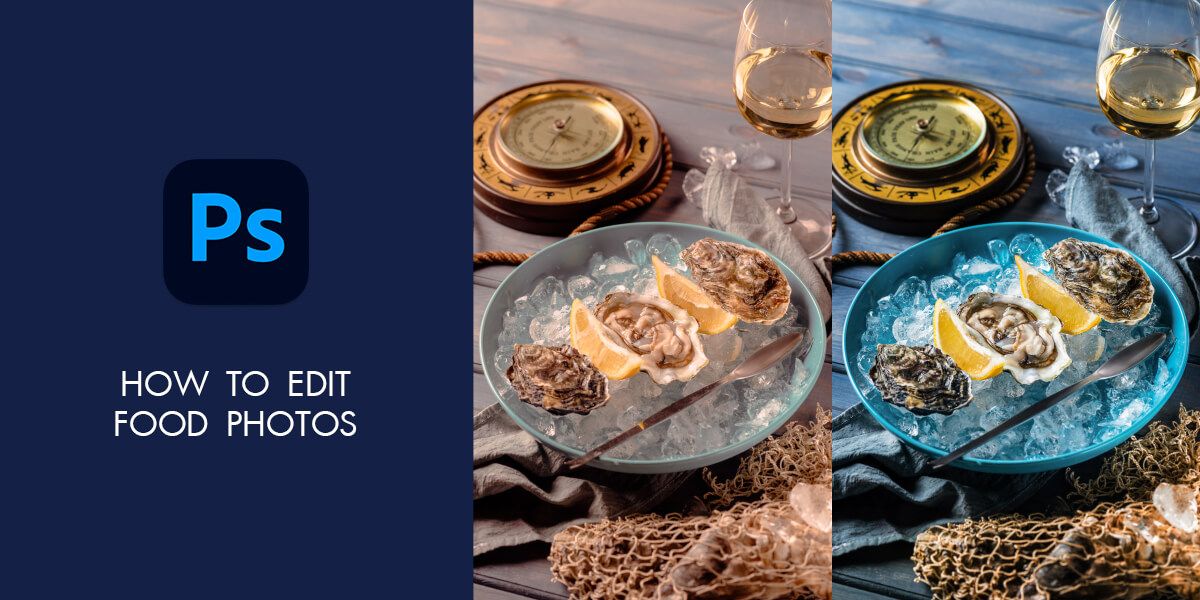
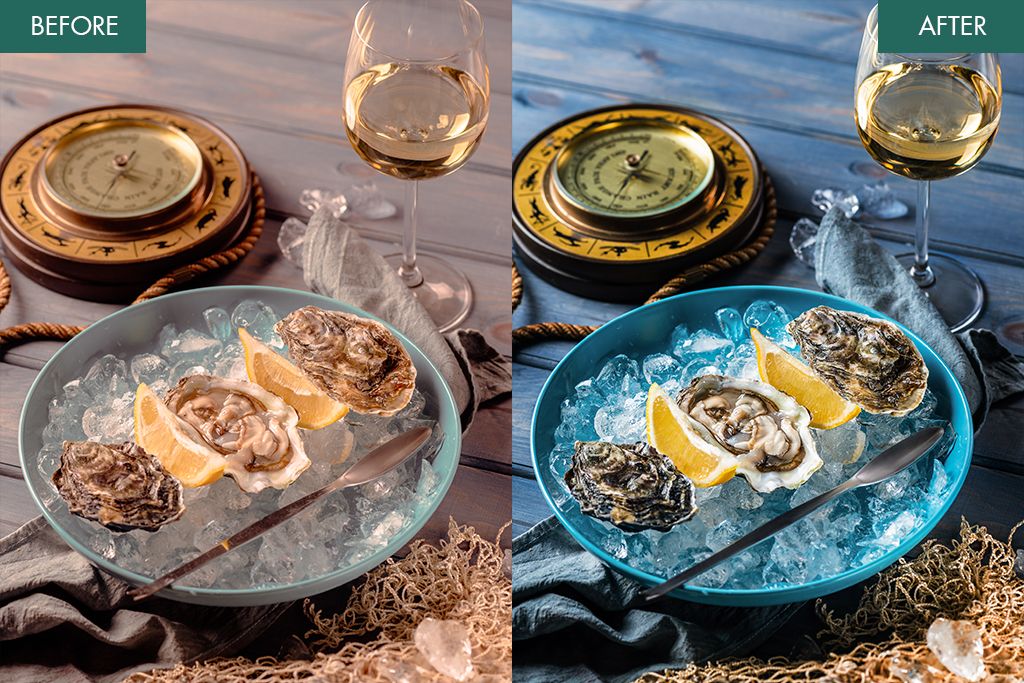
If you want to make strides in food photography and earn money by selling such images, you definitely need to learn how to edit food photos. The process involves color correction, adding shine to items, removing distracting pieces, creating color accents, adjusting symmetry, and doing all the necessary tweaks so that the resulting picture spur appetite. Color correction poses the biggest challenge, but following the steps described below, you will easily achieve the desired look.
WeEdit.Photos experts improve food images in Photoshop to tackle all the issues with the utmost efficiency and preserve realism. Today, I want to shine a light on this procedure and describe my personal tricks, so that you can edit photography of food like a pro.
Edit Food Photos in Photoshop in 8 Steps
Whether you own a top-notch DLRS that you use for shooting food or specialize in iPhone photography, this tutorial will work equally fine in both cases. However, if you are pressed for time and need edited images of food as quickly as possible, you can always reach our company for help. We stand out from the crowd with high-quality services and affordable photo editing prices.
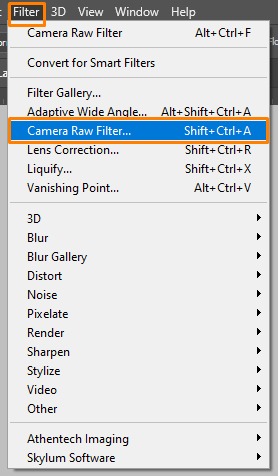
Step 1. To correct colors, you need to use Camera Raw Filter. It is located under the filter menu. Go to Filter->Camera Raw Filter and there will appear the needed window. To open it faster, you can use Shift+Ctrl+A/Shift+Cmd+A shortcuts.
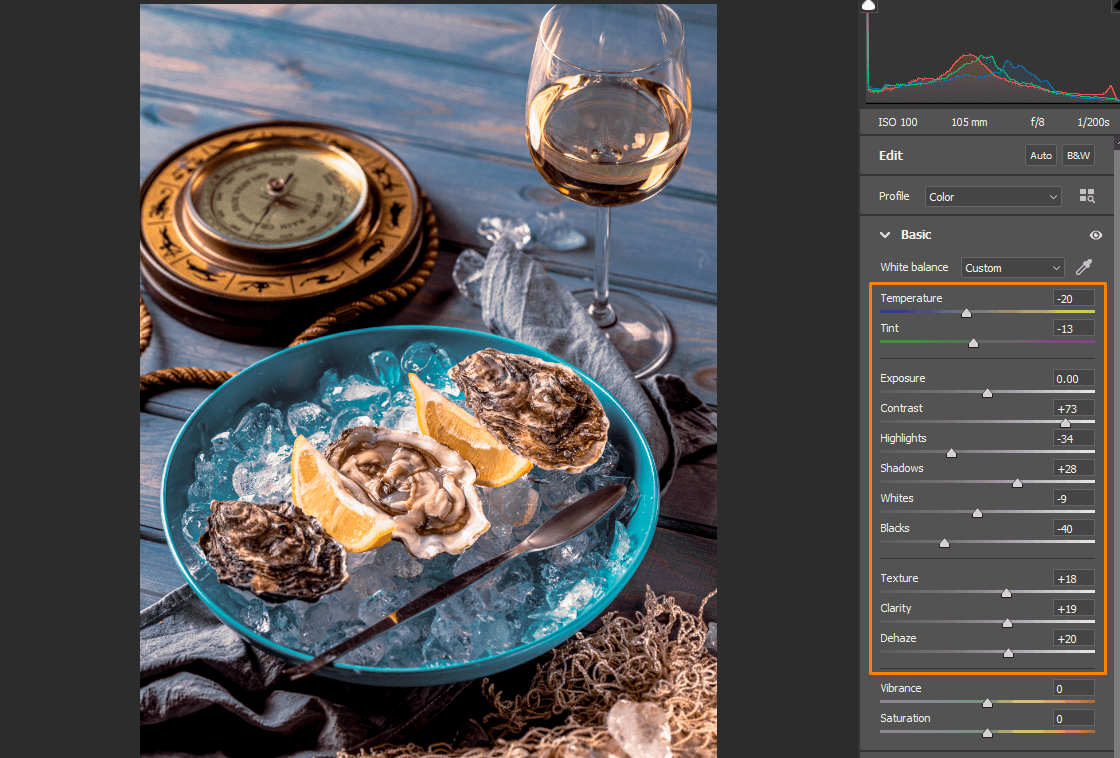
Step 2. Now we need to perform basic color correction. In my photo sample, you may notice problems with insufficient vibrance and exposure. So, I start with adjusting the exposure. I work very accurately not to over-exposing part of the picture. I also recommend raising contrast and sharpness. Not to lose lifelike hues, you can use a custom WB. Besides, I suggest adjusting the temperature till there appears a warm glow.
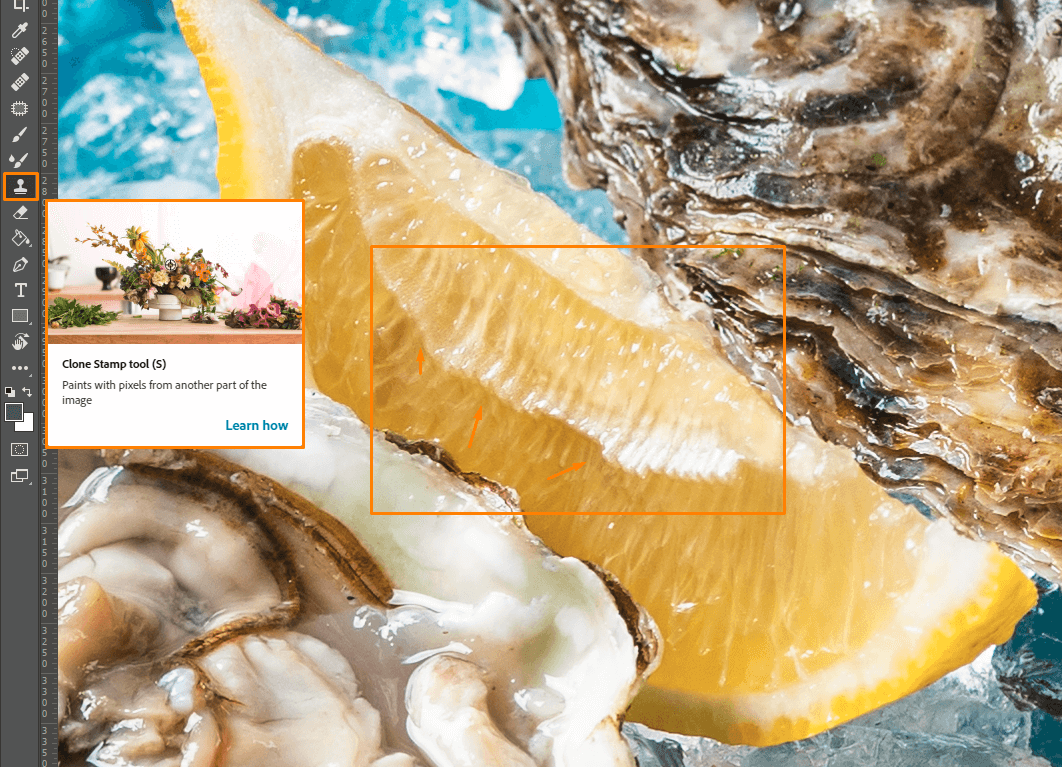
Step 3. Use the Clone Stamp tool. You can immediately activate it by pressing S (regardless of the OS).

This stage of food photo editing involves eliminating defects, glare, and polishing the background & props. To use the Clone Stamp tool, you need to hold down Options/Alt and click to select a source point to clone from.
Release the key and move the cursor over the area you want to clone to. Next, click and drag with your mouse.
Step 4. Select the Healing Brush Tool from the toolbar or press J to access it straight away. We will do similar manipulations as in the previous step but use another tool.
To differentiate these 2 instruments, you should remember that the Clone Stamp tool is aimed at creating, duplicating, and removing objects in a scene, while the Healing Brush tool better copes with adjusting the textures of objects.

There are still some defects in my photo I have to fix. For example, I need to improve the napkin, wine, and table. So, scrutinize your image and find yours.

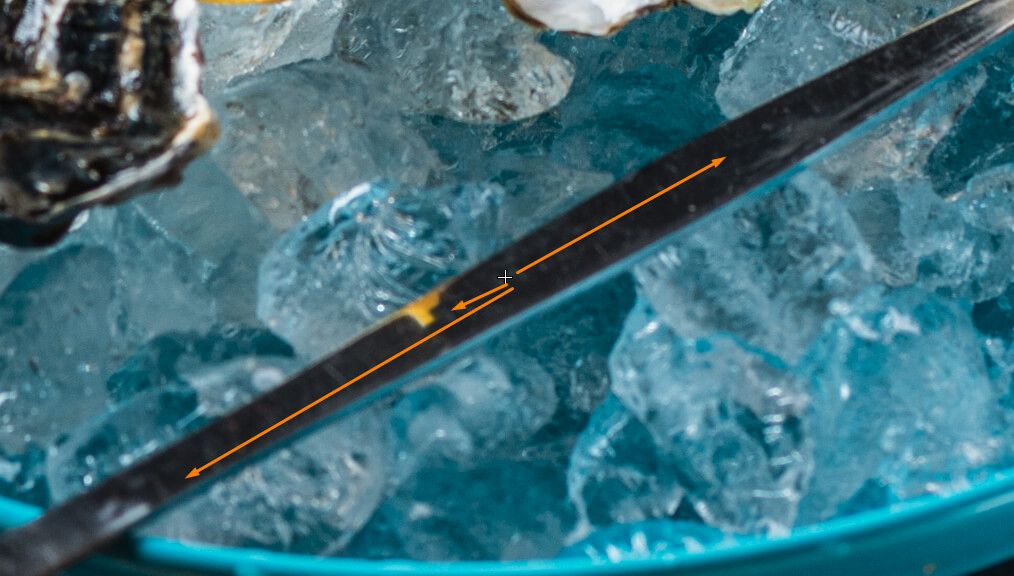
Step 5. Use the Stamp Tool to cleanse your photo. Examine it one more time to figure out whether you’ve fixed all imperfections. I see that I haven’t thoroughly improved the lemon and I’m going to give it a perfect look by using this instrument.
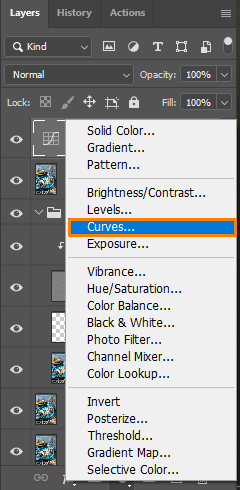
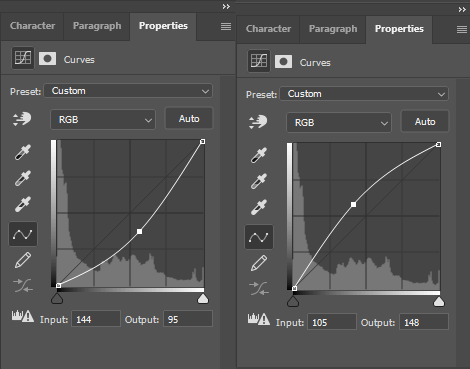
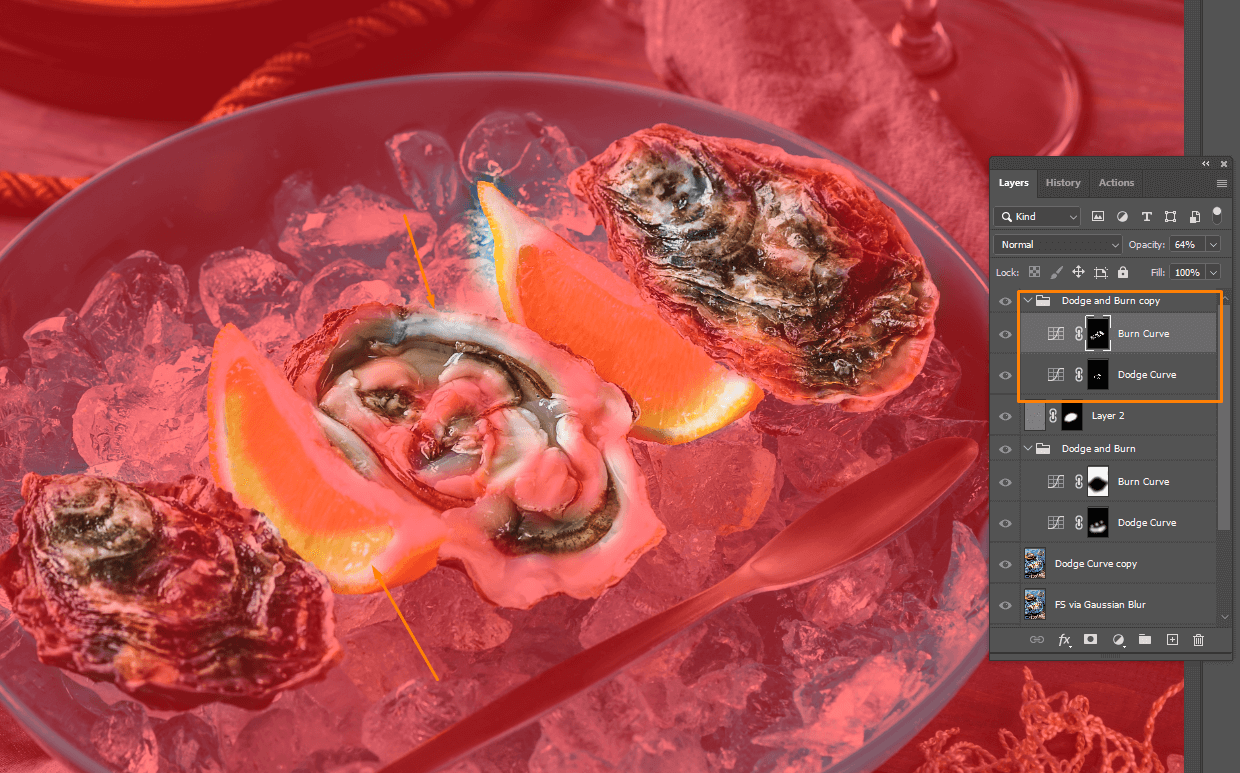
Step 6. Create a curves adjustment layer. To apply the Curves adjustment, head to the Adjustments panel and click on the Curves icon there. Next, choose Layer > New Adjustment Layer > Curves. Click OK in the New Layer dialog box. In the Curves adjustment, you can adjust points through the photo’s tonal range.
We need to create 2 curves – Dodge and Burn. Drag the curve one downwards, and the second one – upwards.
Now, the layers panel should look like the sample above. In fact, our task is to create volume in the photo. We need to darken everything around so that light is fully concentrated on a dish.
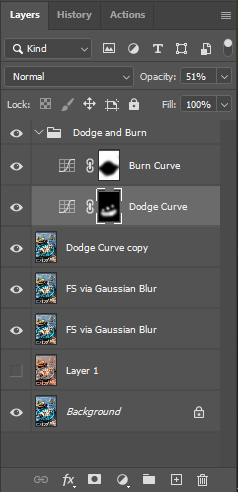
We’ve created two layers and added volume to the whole photo. Now, we need to duplicate and draw the details inside, creating a microvolume. The screenshot below shows how you can draw details using a mask.
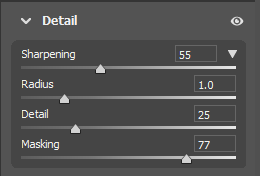
Step 7. Raise sharpness slightly. To do this, go to Filter – Camera Raw Filter – Details – and use the following settings.
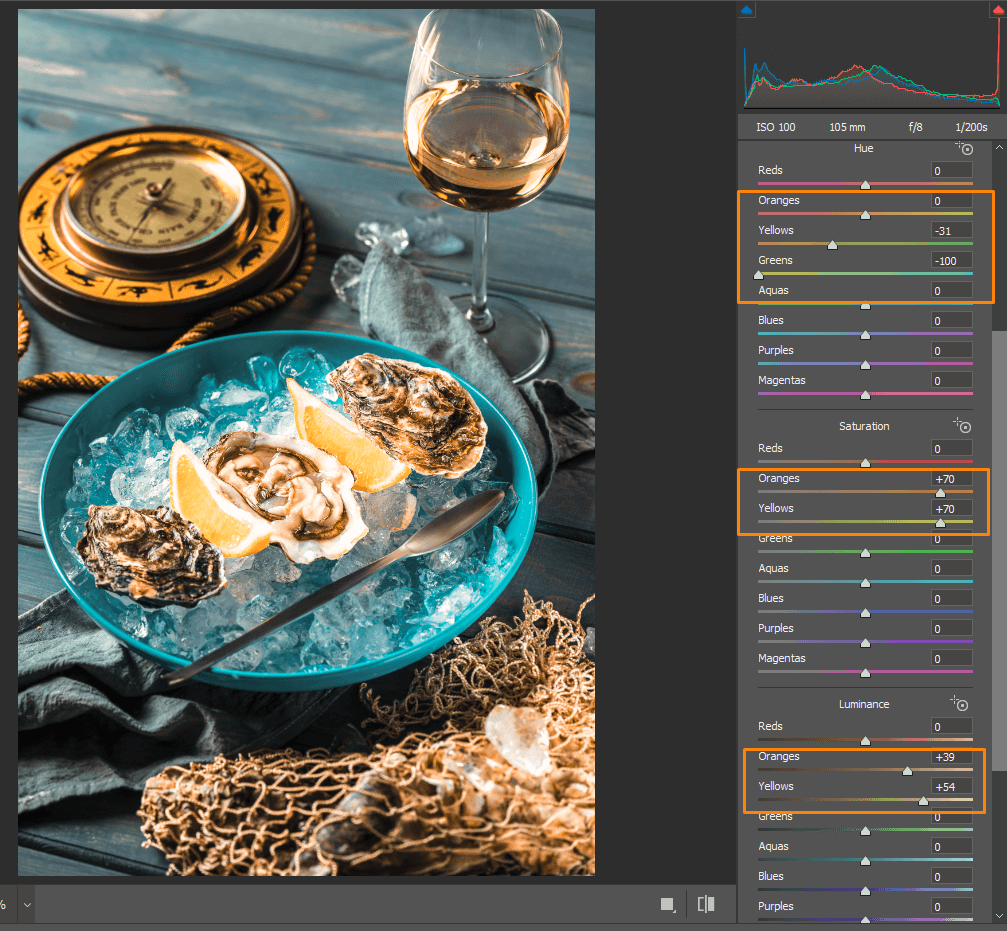
Step 8. When you edit photography of food, it is very important to add color accents to images. In this case, it is glass, grid, and compass. I add saturation to the orange and yellow, so the yellow tilts toward orange.
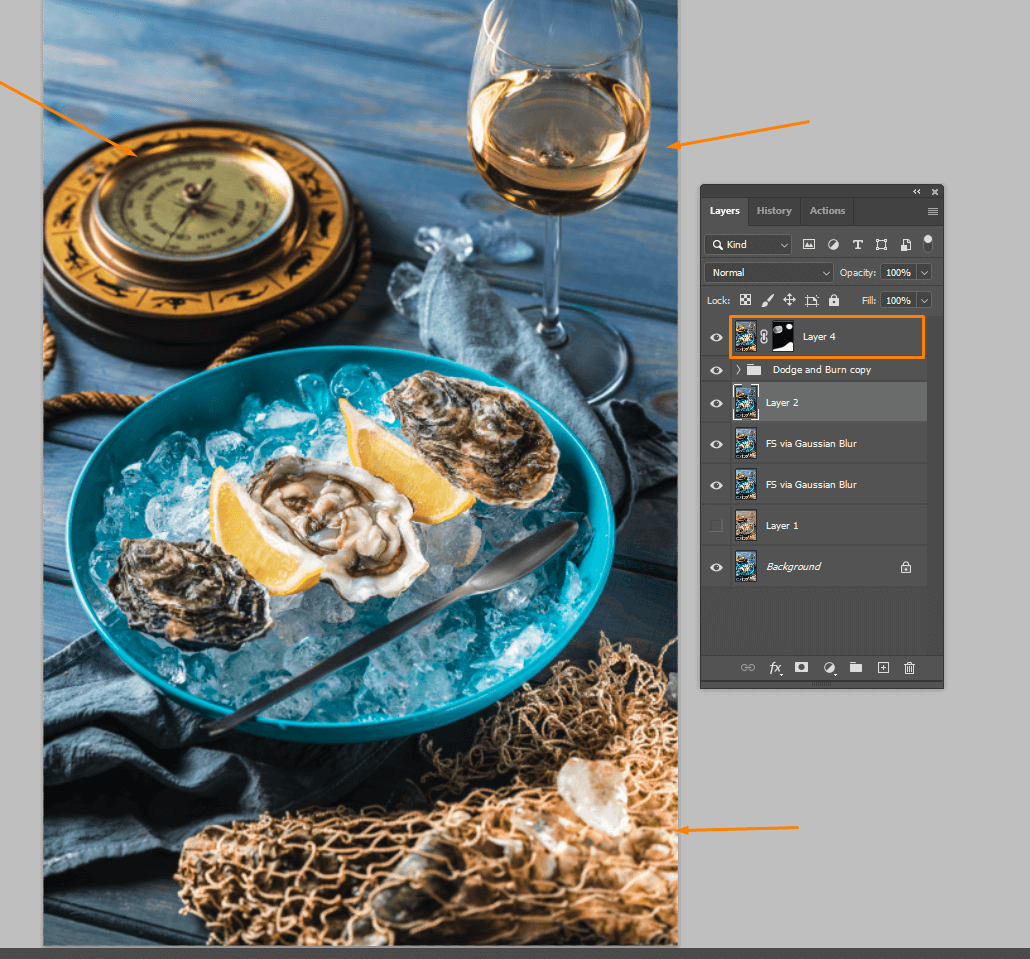
We overlay a black mask on this layer and use a white brush to show only specific areas. That’s all! As you see, this tutorial on how to edit photo photos doesn’t require using complicated photo manipulation ideas but implies tenuous tuning.
FAQ
- How to edit food photos in Photoshop without sacrificing realism?
To improve the look of food images and end up with a lifelike result, you need to stick to optimal settings for “flow” and “opacity”. Sometimes, reducing the flow to 10% may have a more noticeable impact than using the brush as 100% flow.
- What is the best mobile app for improving photos?
Photoshop Express Mobile is a great iPhone photo editor that is user-friendly yet feature-rich, so you can give your photos a perfect look without much headache.
If you are searching for an Android photo editor, you should opt for Snapseed. It is an application developed by Google for creative users who want to embellish their shots with unique effects.
- Is there a current licensed version of Photoshop with a single payment system?
No, but Photoshop is available as a part of the CC package. So, you can take advantage of its features by paying a monthly subscription fee. Thus, you can use integrated cloud storage and other programs included in the package.
- How to increase history steps in Ps?
You can set the number of steps stored in the memory by choosing Menu Bar: Edit > Preferences > Performance (Photoshop > Preferences > Performance on Mac devices) and change the value in the History States text box.
- How to fix color problems in Ps?
Performing food photo editing, you will inevitably deal with tones and colors. You need to select the white point Eyedropper icon in the lower right corner of the Levels dialog box and then click on the first target marker with the tool to fix any tonal and color problems in the highlights.