- Home
- Services
- Portrait Retouching Services
- Wedding Photo Editing Services
- Color Correction Services
- Glamour Retouching Services
- Photo Retouching Services
- High End Photo Retouching Services
- Background Removal Services
- Photo Correction Services
- Photo Post Processing Services
- Photo Enhancement Services
- Photo Post Production Services
- Photo Culling Services
- Pricing
- Portfolio
- Shop
- Blog
- Login
How To Download Presets To Lightroom: 2 Methods To Try
-
Juli Allen
-
April 25, 2022
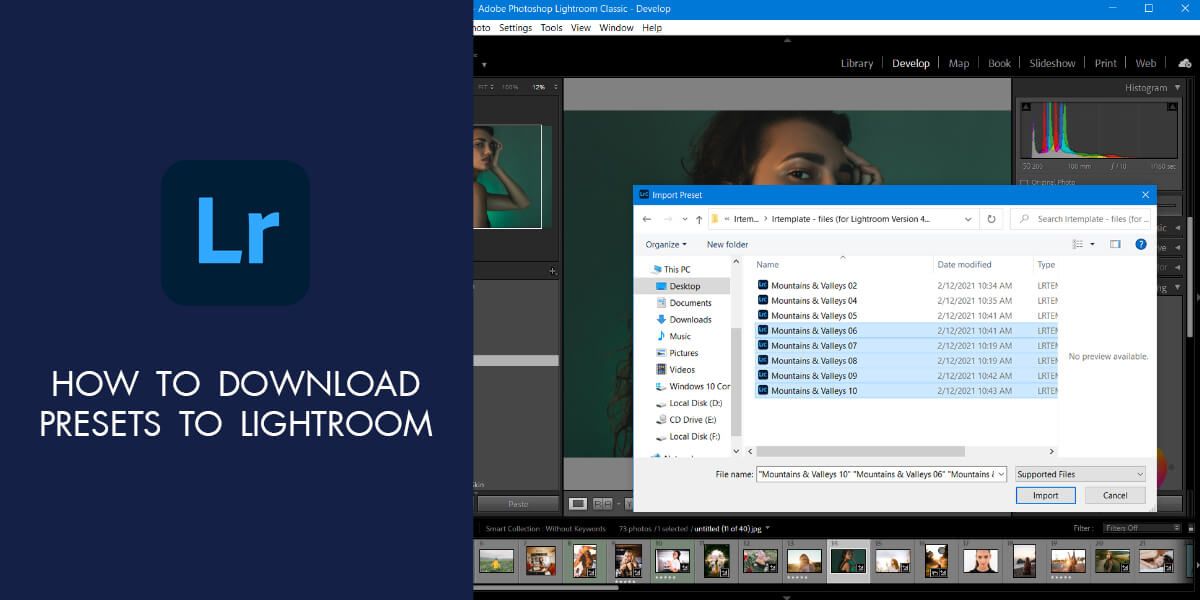
Prefer purchasing presets rather than creating them on your own? Don’t know how to download presets to Lightroom? This detailed guide from WeEdit.Photos experts help you understand the process in detail. It works for presets in .xmp vs lrtemplate formats.
The method described is suitable if you use the latest Lightroom Classic version. In case you still face problems regarding the presets import, you should update the software to the latest version.
Method №1 – For Presets in the Archive
Follow this method, if you need to download presets from the archived folder. With the help of the presets, you can easily edit pictures in this photo editing software. You can apply presets to a single image or several photos at once. To use presets, go to the Develop workspace.
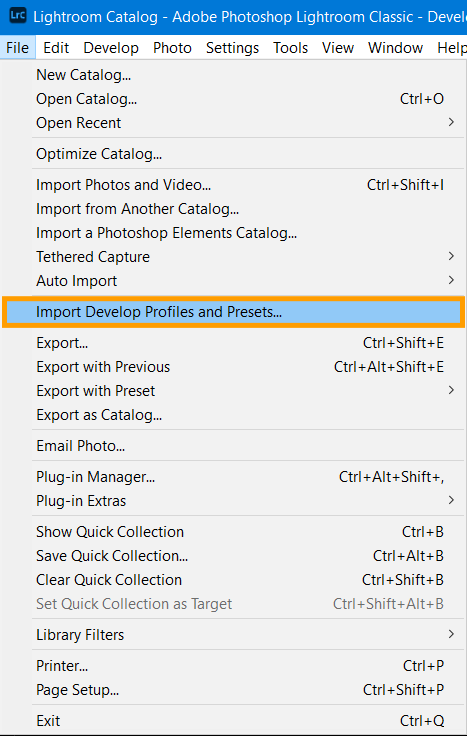
Step 1. Choose File > Import Profiles & Presets in the menu tab.
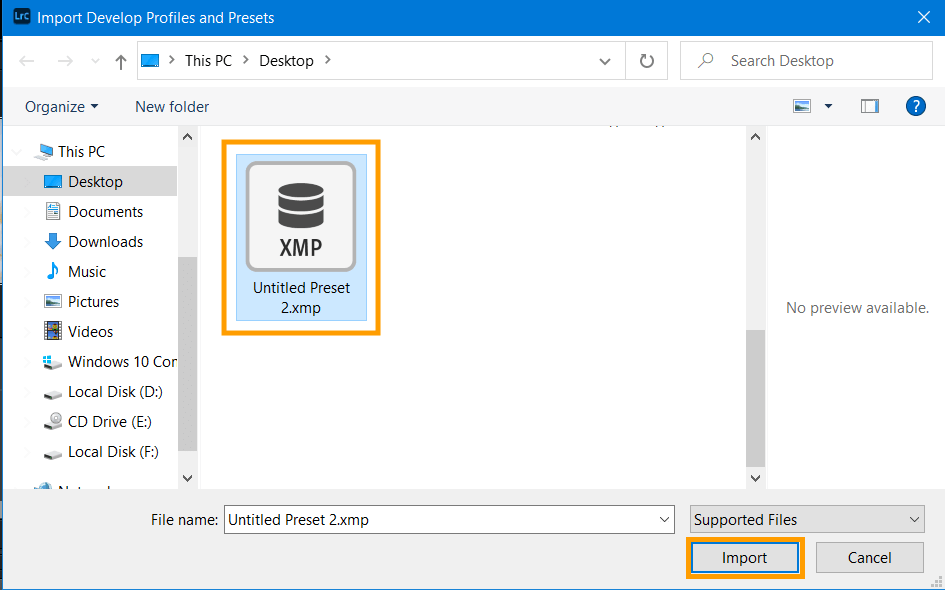
Step 2. In the Import window, navigate to select the profiles or presets you want to import.
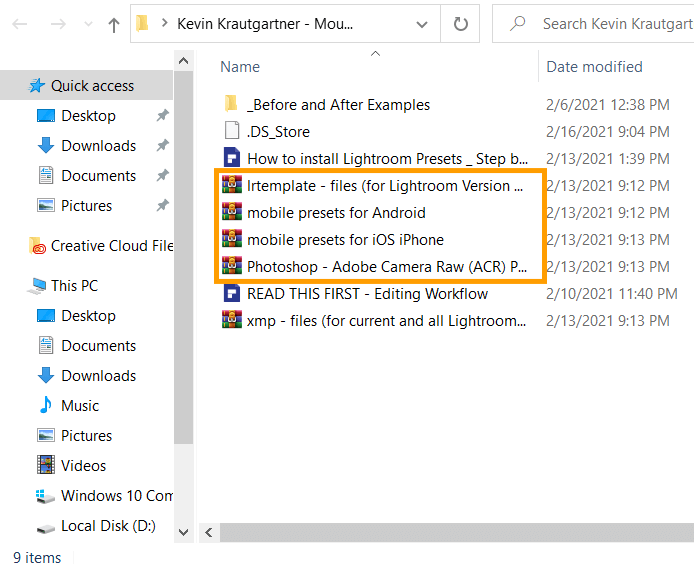
Step 3. Unzip your presets if they are archived.
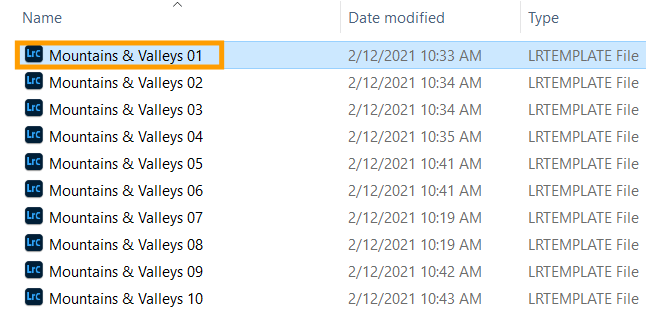
Step 4. You can select any preset from your list by double-clicking.
Step 5. In the pop-up window, click the Install button. Once you restart Lightroom, you can start using presets. You can find all the presets in the tab on the left.
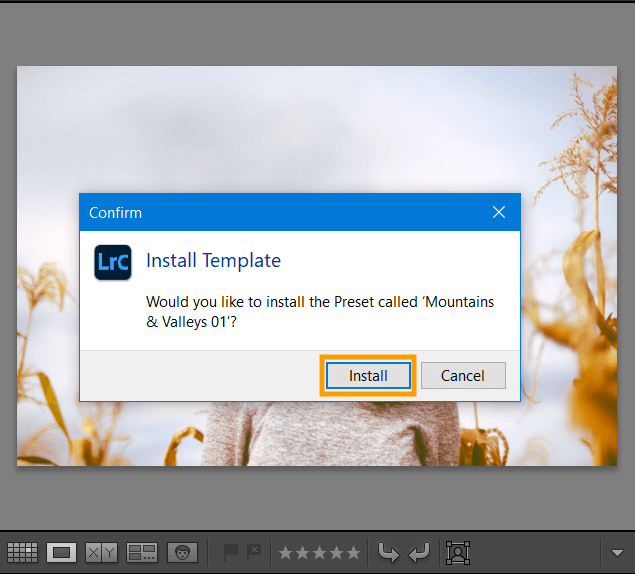
Pro Tip: When adding presets through the interface or directly to a folder, make sure the files are not damaged and have the correct extension. Otherwise, Lightroom cannot recognize the preset to open it.
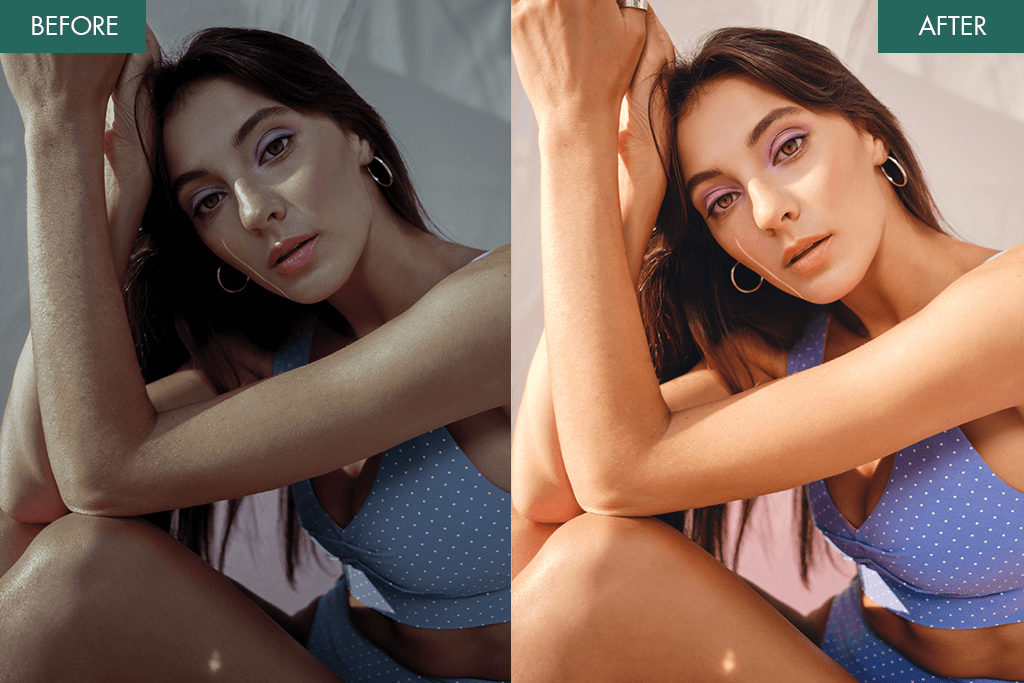
If you didn’t manage to do this, you can contact our service to get professionally edited photos. The Weedit.Photos team corrects colors and performs other needed adjustments. Using properly calibrated monitors, we deliver professional results regardless of the quality of source files.
Method №2 – The Fastest
If you wonder how to add presets to Lightroom if your files are in .xmp vs lrtemplate formats, you can try this simple method. In case you face problems installing and opening presets, you should check if your Lightroom version supports them.
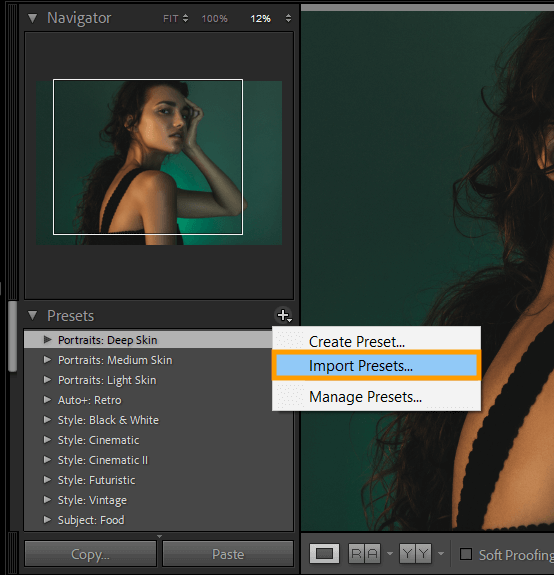
Step 1. Press the + button next to the tab with presets and import them manually.
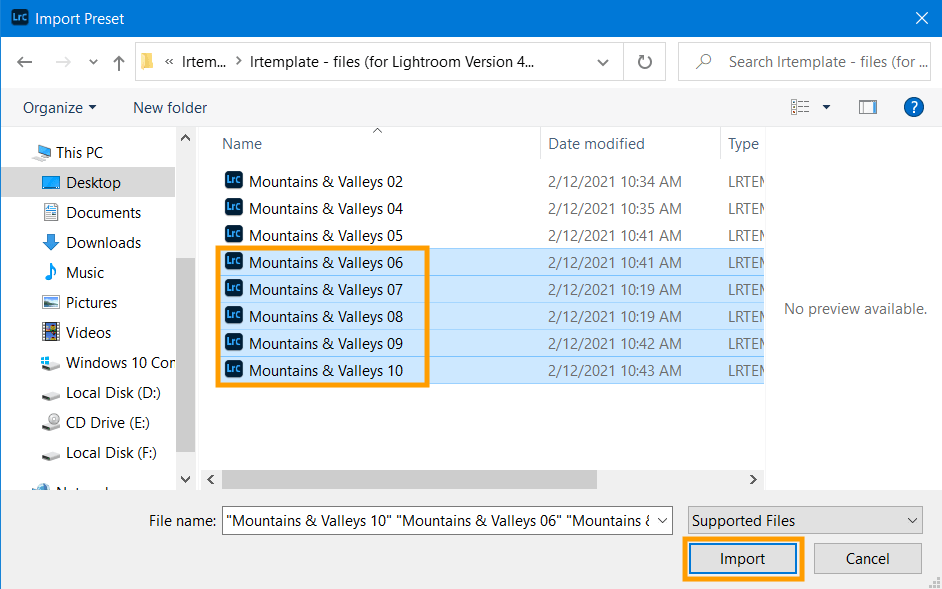
Step 2. In the window that opens, select the presets that you want to import to Lightroom.
Step 3. You can find all the presets in the User Presets folder.
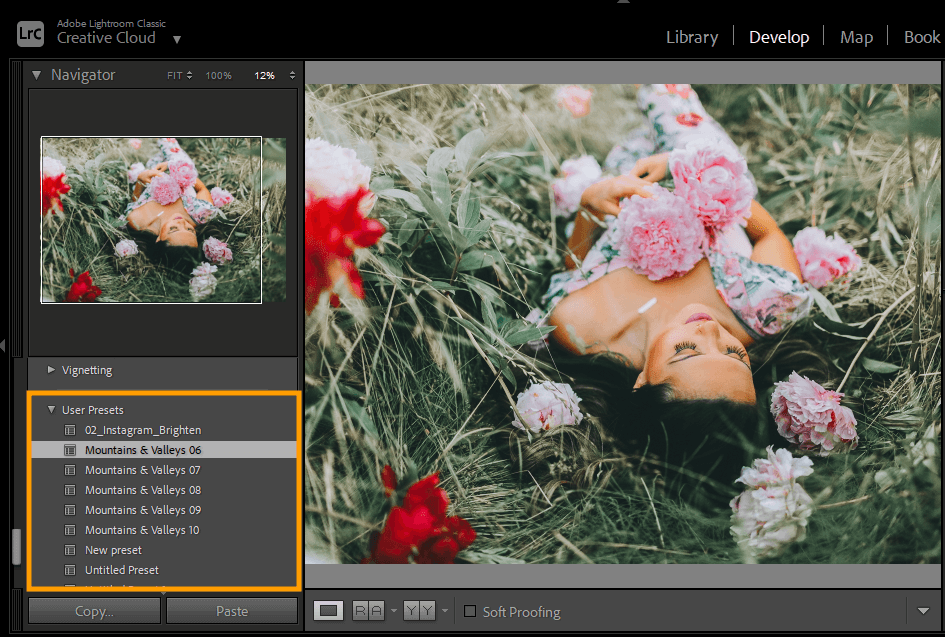
Pro Tip: Keep in mind, that when you create a new preset in the photo editor or add it through the interface using the “Import” button, all setting files are saved to your computer by default. Thus, you can find all presets in a folder along with other add-ons for Adobe Lightroom.
FAQ
- Should I really use presets?
You can use different presets to get pro-level images while you are mastering manual editing techniques at a convenient pace. However, even professionals use such filters to make their workflow faster.
- How does a preset work in Lightroom?
Lightroom offers a configuration of settings named preset. They help you create a certain style and add effects to your pictures. You need to import presets to Lightroom. Once done, you can click the added preset while in the develop module, and it will be applied to a picture.
- How can I apply presets to multiple pics?
First, you should choose the desired preset and add it to a single picture. It helps you understand if you like the result or need to customize it a bit. Once done, you should select other pictures you want to edit and press the Sync button to call for a dialog window. Then you can choose certain parameters to be synchronized.
- What if my presets don’t work in Lightroom?
Once you install presets, you need to restart Lightroom and load a supported raw file. Besides, you should check your Lightroom Classic preferences (Top menu bar > Preferences > Presets > Visibility). In case there is the “Store presets with this catalog” option checked, you need to uncheck it. Once done, you can start using presets.
- How can I remove presets?
If you’ve decided to choose many presets and then filter them, you can delete unnecessary ones later. First, right-click on the preset, and choose “Delete” in the drop-down menu. If you want to cancel the action, you can use a key combination – Ctrl + Z. Then go to the Lightroom presets location on your device and remove them.
- Weedit.Photos Blog
- Editing Tips & Tutorials
- How To Download Presets To Lightroom: 2 Methods To Try

