- Home
- Services
- Portrait Retouching Services
- Wedding Photo Editing Services
- Color Correction Services
- Glamour Retouching Services
- Photo Retouching Services
- High End Photo Retouching Services
- Background Removal Services
- Photo Correction Services
- Photo Post Processing Services
- Photo Enhancement Services
- Photo Post Production Services
- Photo Culling Services
- Pricing
- Portfolio
- Shop
- Blog
- Login
How to Edit Night Photos in Photoshop: 3 Methods to Try
-
Juli Allen
-
April 25, 2022
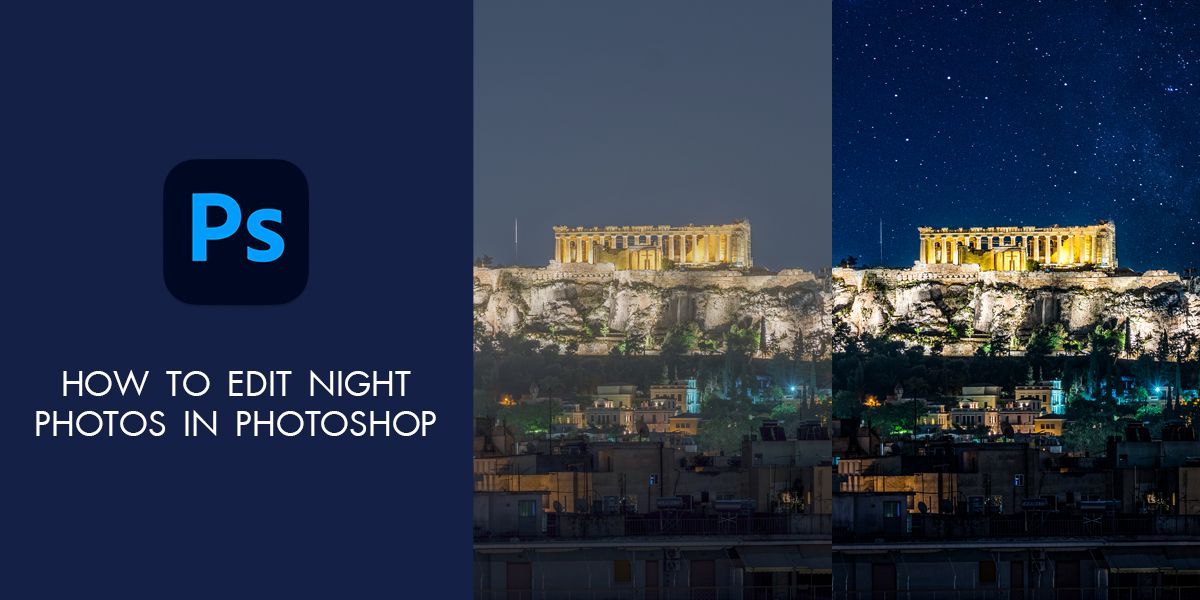
Professional photographers who take photos of night city use special camera filters for achieving the necessary result. However, beginner photographers who don’t have pro-level camera gear still can achieve a similar effect when taking their photos.
In this guide, the WeEdit.Photos experts described 3 easy ways that will help you give your night photos a professional look.
These methods include color correction, color correction + light toning, color correction + sky replacement. Read on to learn how to edit night photos in Photoshop like a pro with little to no experience.
Method №1 – Color Correction
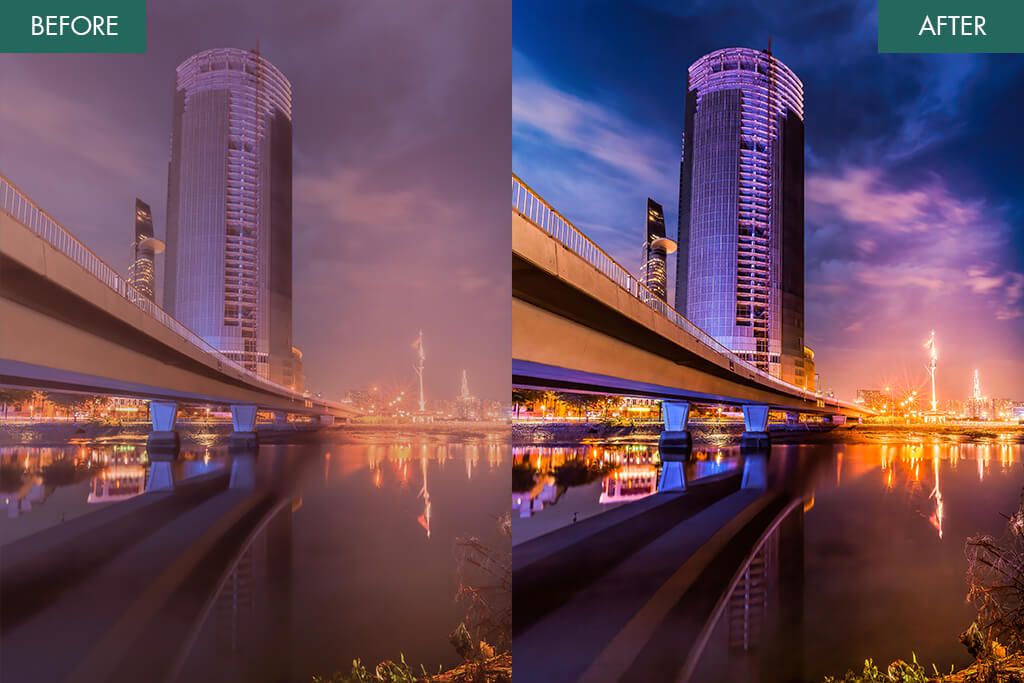
This method is perfect for those who want to simply improve color correction in a night photo. When working in Photoshop, you can adjust all the settings, from exposure to saturation. Color correction allows you to fully transform the atmosphere in your photos. Just follow the steps described below to give your pictures a more eye-pleasing look.
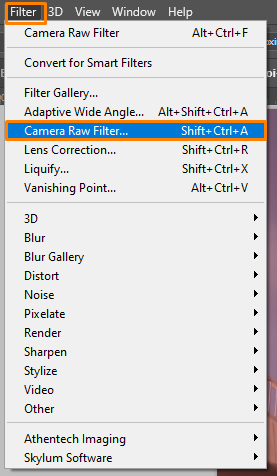
Step 1. Open your photo. Then, go to Filter – Camera Raw Filter.
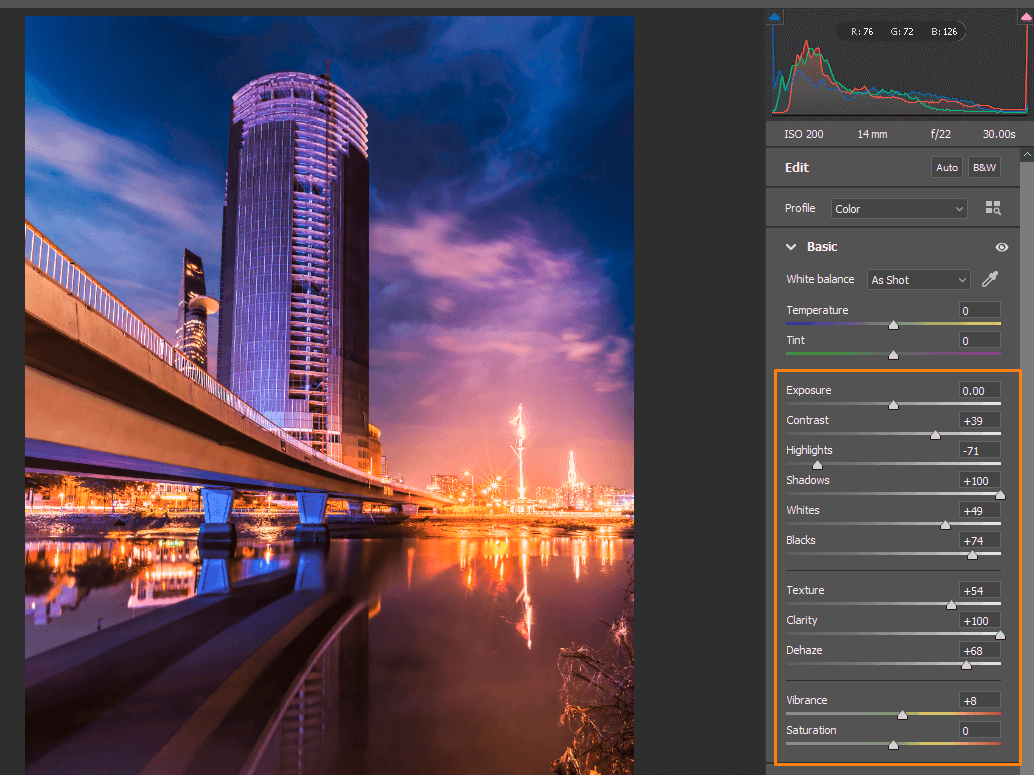
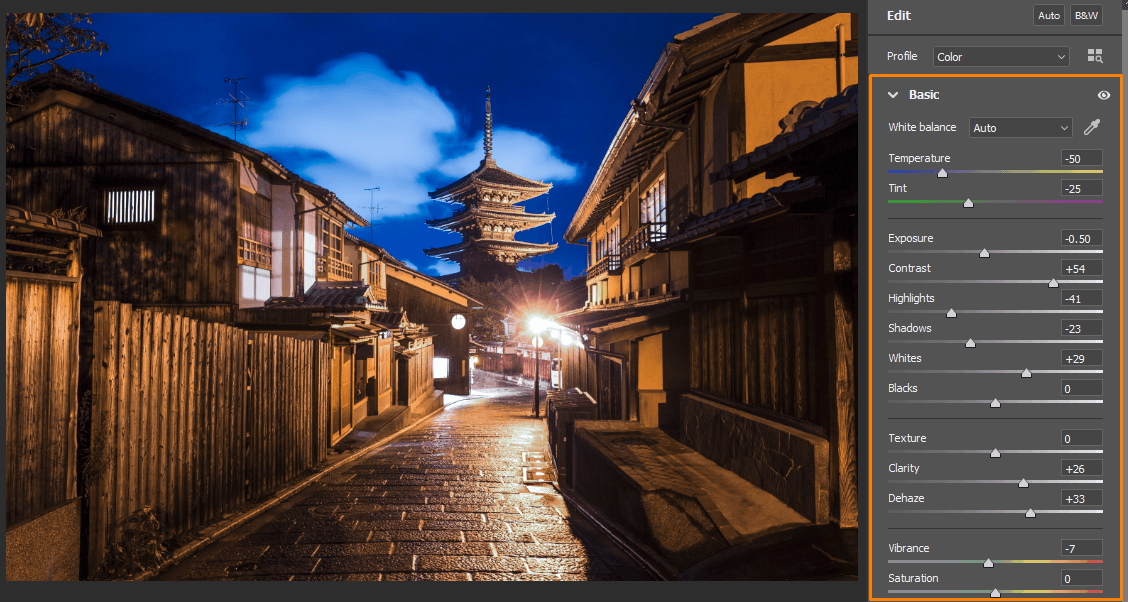
Step 2. When editing night photos in Photoshop, you need to perform basic color correction first. On the right, you will see settings for improving exposure, contrast, highlights, shadows, whites, etc. Drag sliders until you achieve the desired result.
Step 3. Increase sharpness. To do it, click on the «Detail» option. Remember that after adjusting sharpness you need to save your image in any suitable format. The degree of sharpness depends on the purpose of the use of an image. Before making the necessary adjustments, think about whether you need to print your image or publish it on a web page.
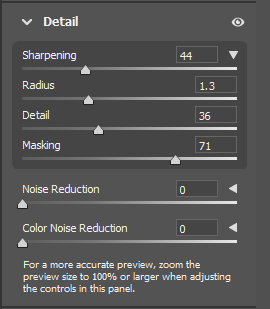
Pro Tip: It’s better to adjust the sharpness slowly, in several takes. First, adjust it for minimizing blur in scanned images or photos taken by a digital camera. After performing color correction and changing the size of the image, adjust the brightness again.
Method №2 – Color Correction + Light Toning
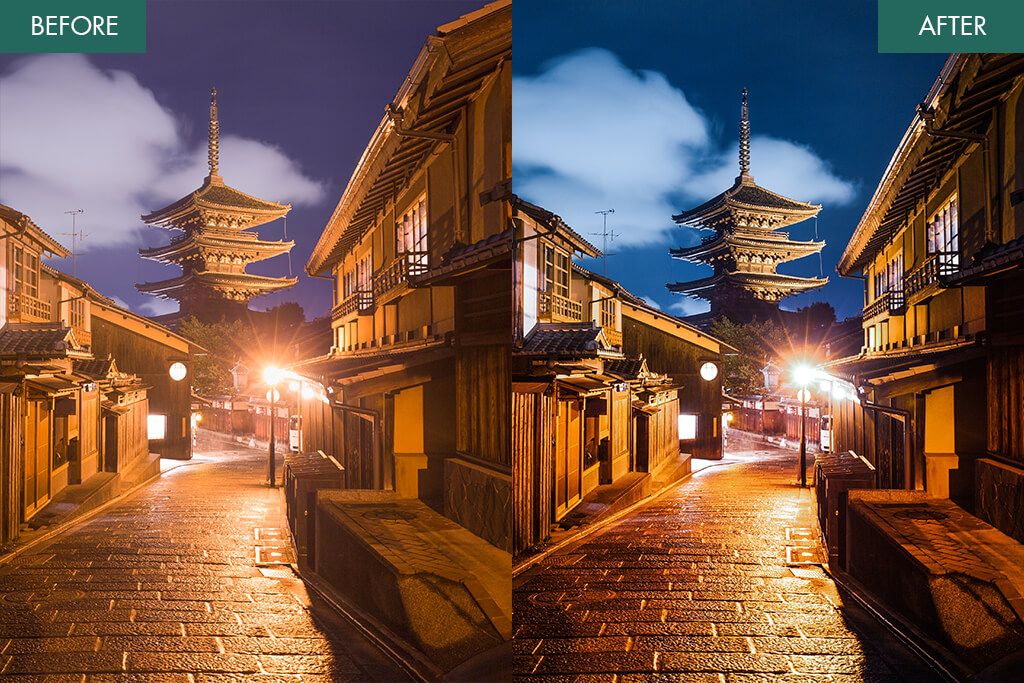
This option is more suitable for those who need to improve colors in a photo and add light toning. Follow the steps described below and adjust the settings that will help you enhance your photos.
Step 1. Perform basic color correction just like you did when following the steps described for the first method.
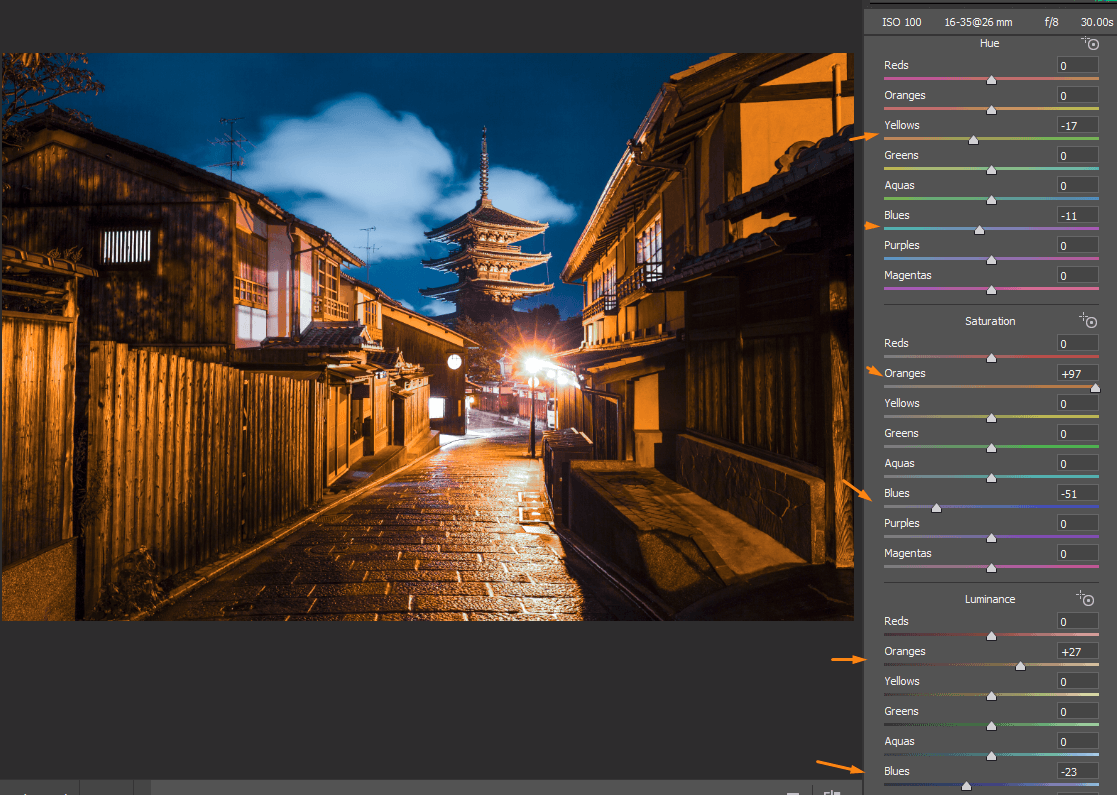
Step 2. When processing night photos in Photoshop, you can make some colors more saturated. In this case, we decided to make the orange color richer. However, everything depends on your photo. You might need to adjust other colors as well.
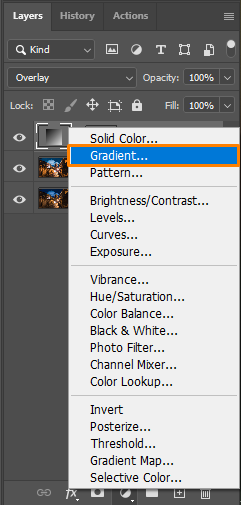
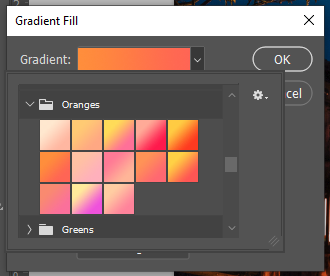
Step 3. Click on the option Create New Adjustment Layer -> Gradient. You can find it at the bottom of the Layers panel.
Step 4. Select any color in your photo that requires enhancement. Your choice will depend on your image.
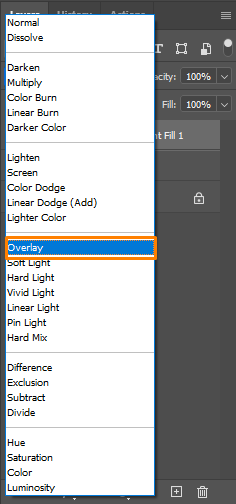
Step 5. Set the layer mode to Overlay.
Step 6. Add a black mask and use a white brush to paint over it.
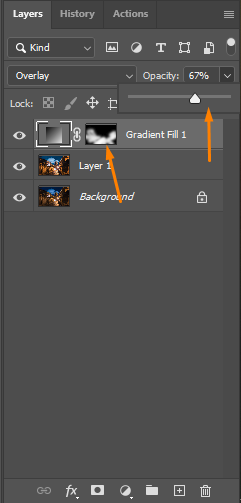
Pro Tip: I recommend you paint over the part of the image that can be enhanced using this technique. For instance, we decided to add an orange glow to the street and street lights.
Method №3 – Color Correction + Sky Replacement
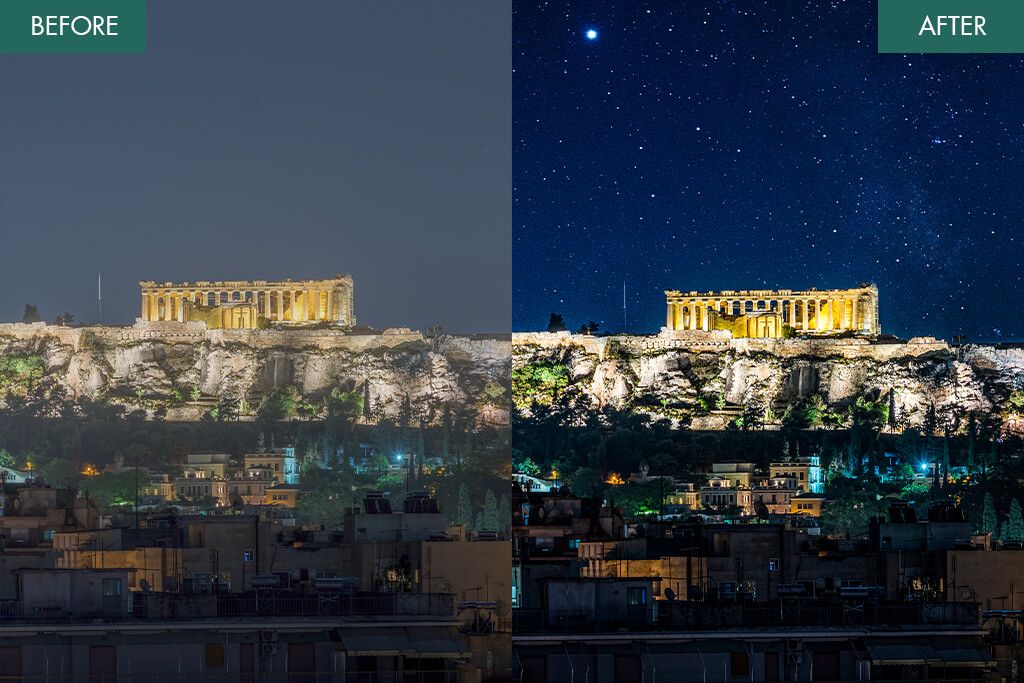
You can use this method if you already have some experience with Photoshop. Read on to learn how to perform sky replacement and add beautiful stars to the background.
Step 1. Perform color correction by following the steps described above for the first and second methods.
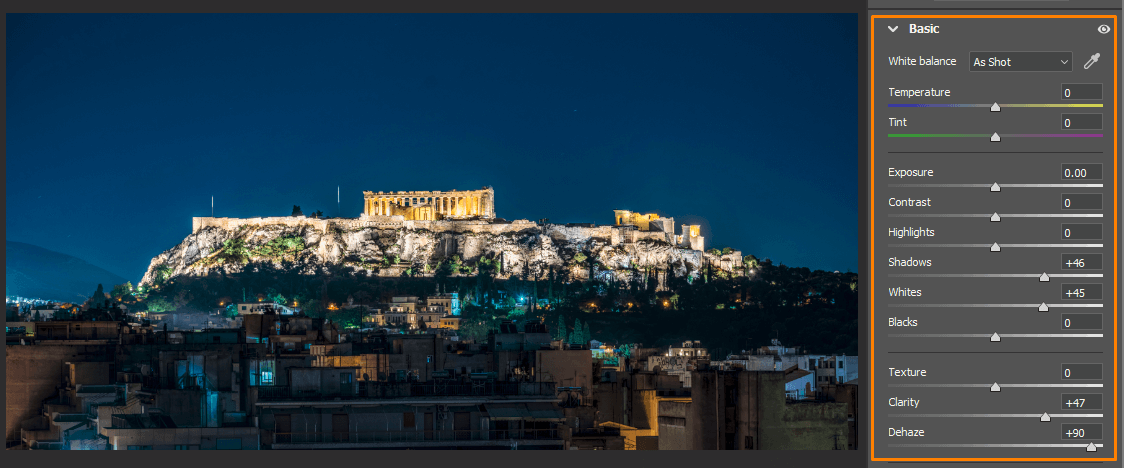
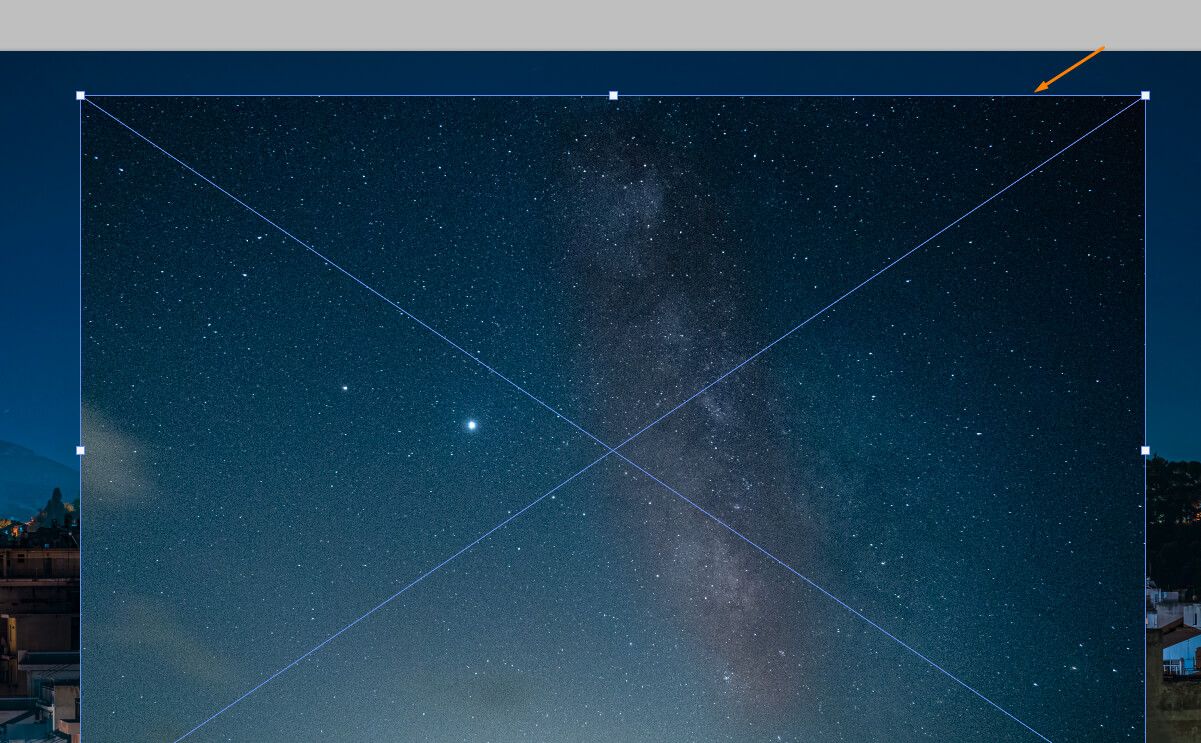
Step 2. When editing night pictures in Photoshop, we add a new layer on the top of the existing one by dragging a photo of the sky to our photo.
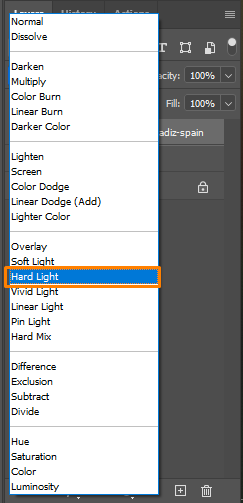
Step 3. Change the layer mode to Hard Light.
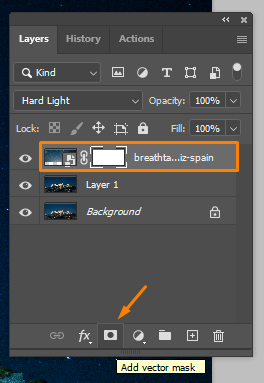
Step 4. Create a mask. To do it, click «Add Vector Mask» in the bottom part of the «Layers» panel. On the selected layer, you will see a white mask thumbnail. Thanks to it, every object in this layer will be visible.
Step 5. Take a black brush and remove the sky where it overlaps with the city.

Step 6. Take a look at the result. Here, you can see the area that we have removed.
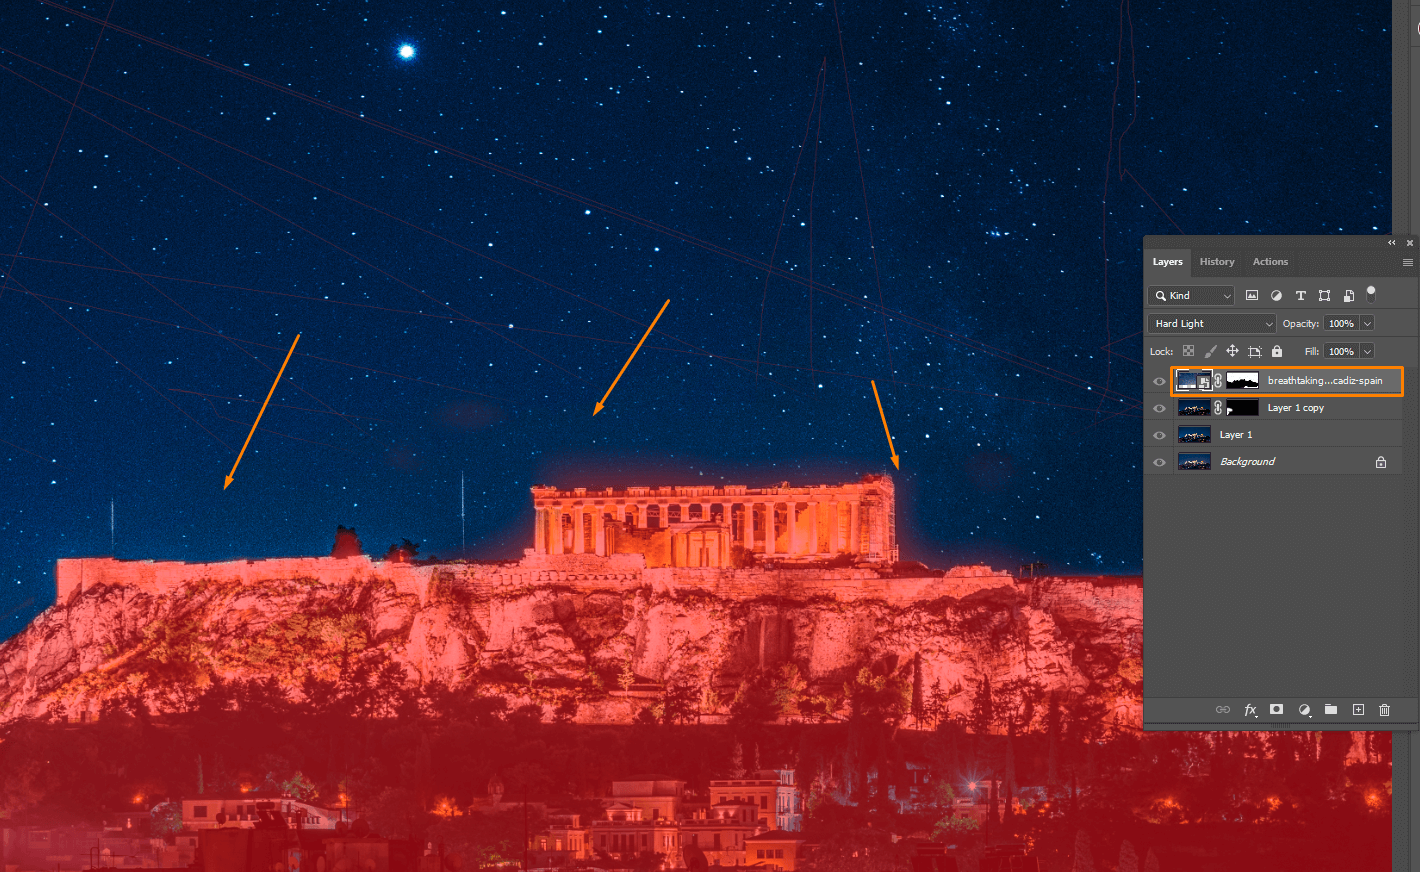
Pro Tip: To add an overlay and keep working with it, click Open and find a photo that you want to use instead of the background. If it’s necessary, you can resize it. Click «Open With» and find another photo that you want to use as an overlay. After dragging and dropping it, change its size until you achieve the desired result.
FAQ
- What does Photoshop do to photos?
This is a widely-used photo editing software with an extensive toolset that allows you to implement a variety of creative photo manipulation ideas. It comes with a range of tools for professional photo editing and allows you to process batches of images. You can use it to create digital drawings and paintings that look as if they were drawn by hand.
- Why do I need to perform color correction when enhancing night photos?
Color correction allows you to adjust colors, tones, and saturation. It’s performed when one needs to improve an image or give it a more creative look. You can do it when you need to make colors look more realistic or lighten your photo. Since it might be impossible to use the right camera settings, colors may look distorted. To make images more realistic, photographers and designers adjust colors manually.
- Is there a limit to layers in Photoshop?
Both Photoshop and Photoshop Elements allow you to create up to 8,000 layers. However, you need to use a powerful computer to be able to do it.
- Is it possible to perform automatic color correction of night photos in Photoshop?
Yes, of course. If you are wondering how to edit night photos in Photoshop, open your image in Photoshop and create a duplicate layer (Ctrl+G). Click on the newly created layer and press Shift+Ctrl+B. This command will help you automatically adjust contrast and colors. The program will detect shadows, mid-tones, and highlights to improve your image.
- Is there a current licensed version of Photoshop with a single payment system?
No, however, Photoshop is included in the Creative Cloud package. You can get access to it by paying a monthly subscription. It will allow you to use integrated cloud storage and other software included in the package.
- Weedit.Photos Blog
- Editing Tips & Tutorials
- How to Edit Night Photos in Photoshop: 3 Methods to Try

