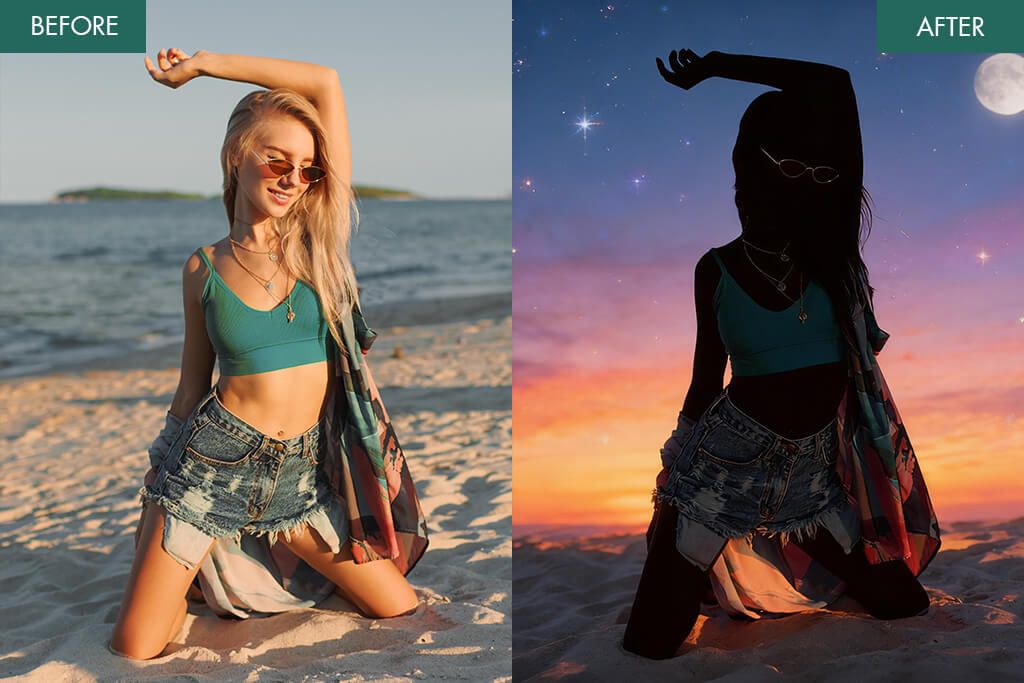
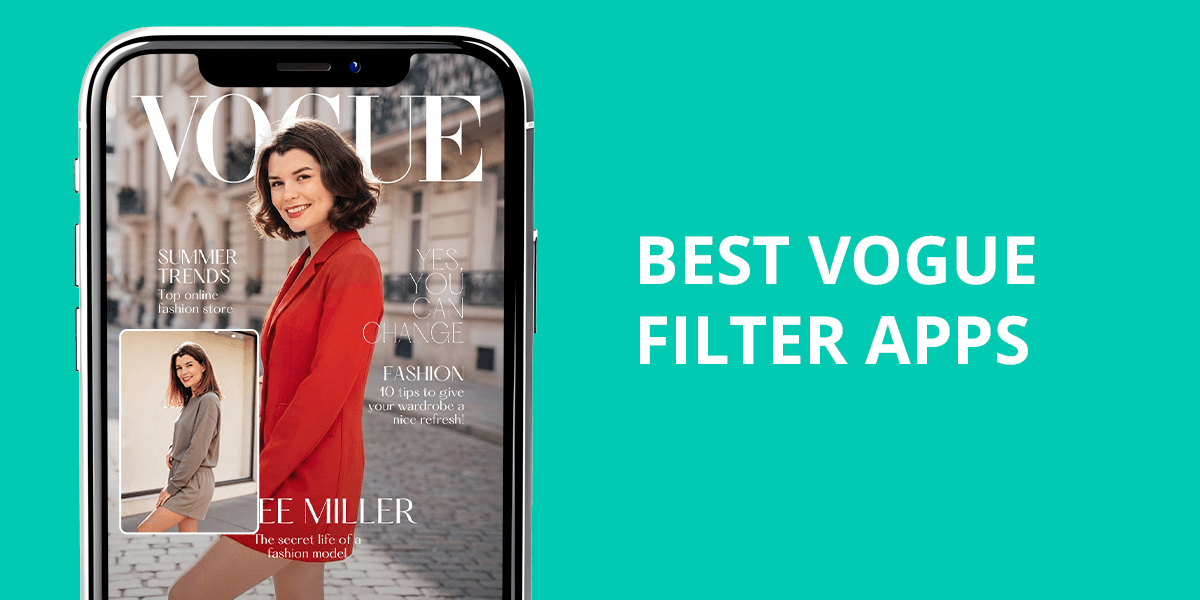
5 Best Silhouette Maker Apps for Shadow-Like Images
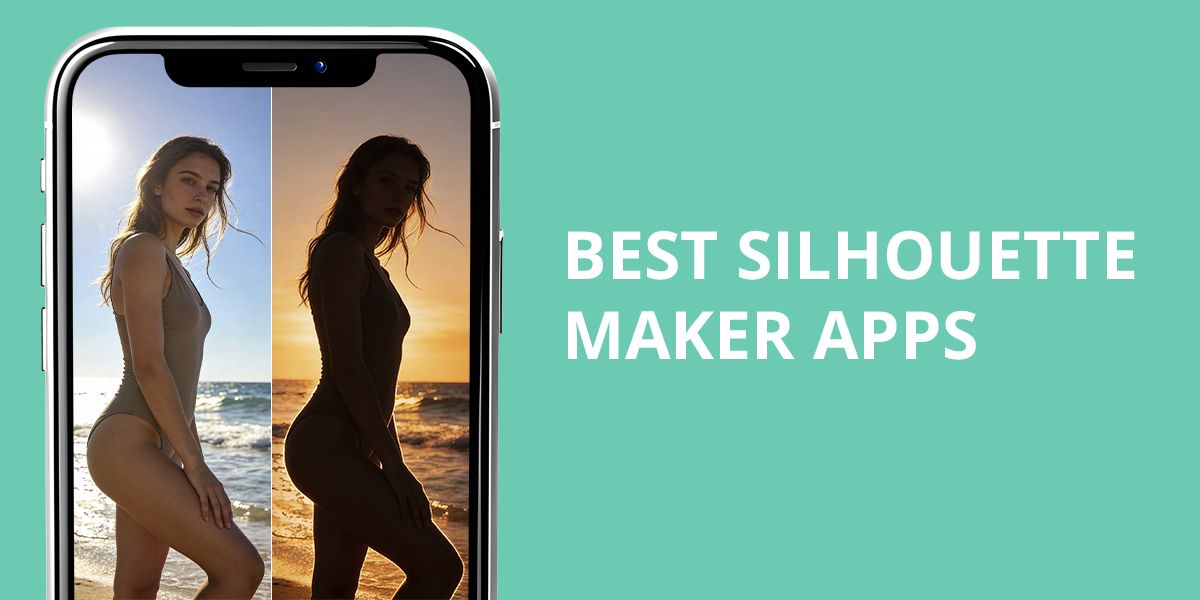
Silhouette maker apps are easy-to-use but effective tools that turn regular photos into sharp, high-contrast silhouettes – images that highlight shapes and outlines instead of small details. These apps typically use automatic background removal and edge detection to separate the main subject, converting a normal portrait or object photo into a strong black-and-white shape.
As a professional retoucher at Weedit.Photos, I usually work with software that offers precise, pixel-level control. But many readers often ask how to create a silhouette image without advanced editing skills or expensive programs. That question led me to test different silhouette makers to see which ones can produce strong results with little effort. During testing, I paid attention to important points such as background removal accuracy, user-friendliness, available editing tools, export quality, and overall accessibility.
AI vs. Manual Silhouettes
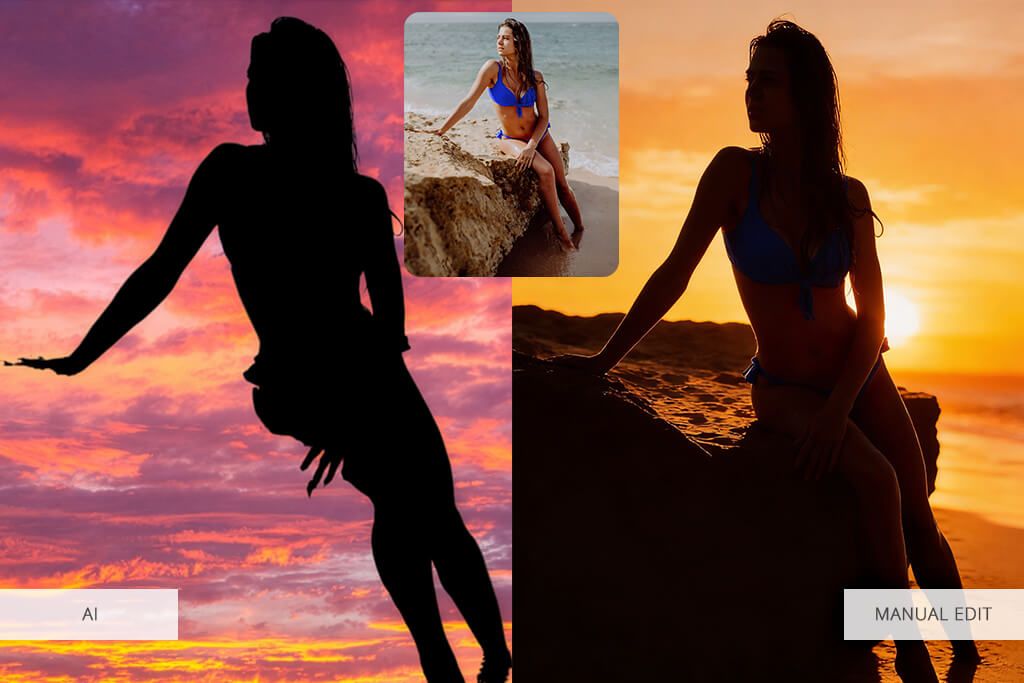
After using professional editing tools for many years, it’s easy to doubt mobile apps that claim to give great results with just one click. I’ve spent a lot of time carefully cutting out subjects, cleaning up edges, and fixing lighting to get the perfect silhouette, which needs patience and attention to detail.
So, I was curious whether these silhouette maker apps could really offer that same level of control. In the end, creating a silhouette isn’t only about using background removal tools. It also depends on keeping the correct outlines, balanced lighting, and strong overall composition.
Some of the apps impressed me more than I expected. With modern AI-based edge detection and background segmentation, they can quickly trace a person or object in seconds. In several cases, the silhouette looked clean enough that I didn’t need to open Photoshop at all. Still, the biggest differences appear in the finer details. While AI does most of the work, it can miss delicate areas like thin hair strands or semi-transparent materials. In those situations, manual refinement makes a clear difference.
Over time, I started viewing these apps in a new way. They aren’t designed to replace professional editing software – instead, they offer an easy solution for anyone who wants a stylish silhouette without learning complex tools. For casual users or small business owners who need simple visuals for branding or print, a silhouette generator can be a fast and practical option.
Even as a retoucher, I was impressed by how much they can handle on their own. In many cases, they complete around 80% of the process automatically, leaving only small final adjustments for those who want a flawless result.
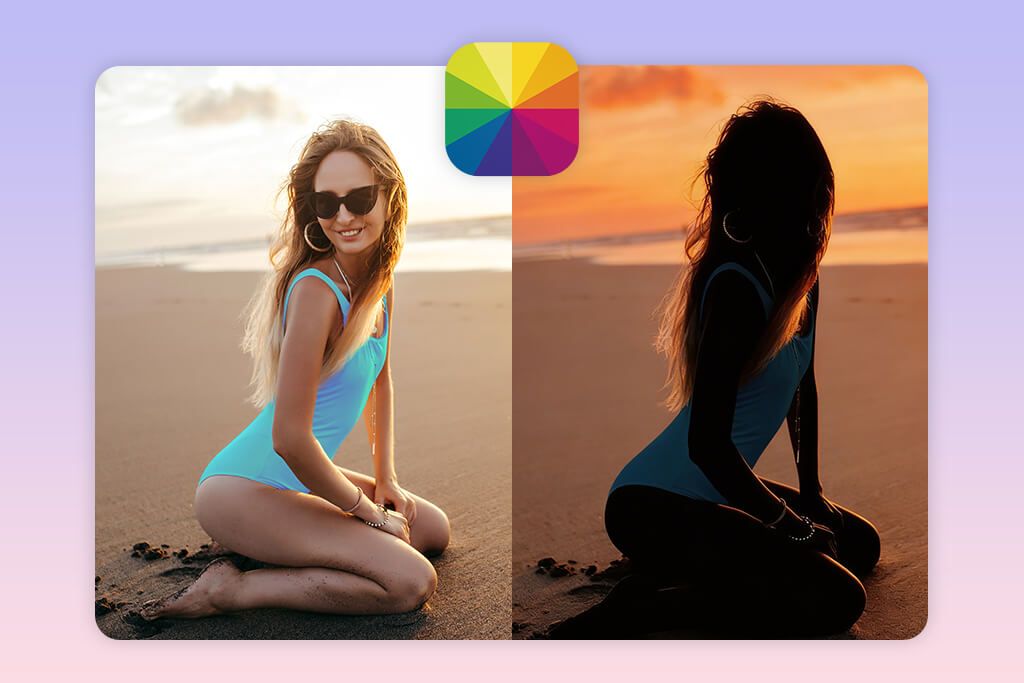
1. Fotor
- One-tap silhouette creation
- Sharp, high-resolution output
- Easy-to-use interface
- Additional AI editing features
- Performs online & offline
- Slight softening around edges
I’ve been using Fotor for years, mostly for quick edits like fixing lighting, cropping, or enhancing a photo without having to open Photoshop. So, when I heard that Fotor now includes a silhouette maker, I figured it would be nothing more than a basic, fun tool. Still, I decided to give it a try. To my surprise, the result was clean and precise – honestly, it came pretty close to what I can create in Photoshop after spending time on manual masking.
The whole thing was really simple. I uploaded a test portrait, clicked on the “Silhouette” mode, and in just a few seconds, the app created a clean black-and-white version with strong contrast. It did a surprisingly good job with the edges of the hair, and the background was removed perfectly, which is something a lot of online tools have trouble with. I also tried the “Original” mode, which kept the background but made the subject darker, giving the image a bold, poster-like look. The whole process felt smooth and easy: upload, pick a filter, preview, download – all done in less than a minute.
What stood out to me was how Fotor lets you make small adjustments after creating the silhouette. I added a thin white border, tried out a few options from AI photo enhancer apps, and even placed text on top to see how it would look as an event poster. It felt more like experimenting than doing actual editing. The only thing I didn’t love was that sometimes the edges of the silhouette looked a bit too smooth – a little detail got lost around more complex outlines. But for most people, especially those who just need a nice silhouette for a project or social media, that won’t really matter.
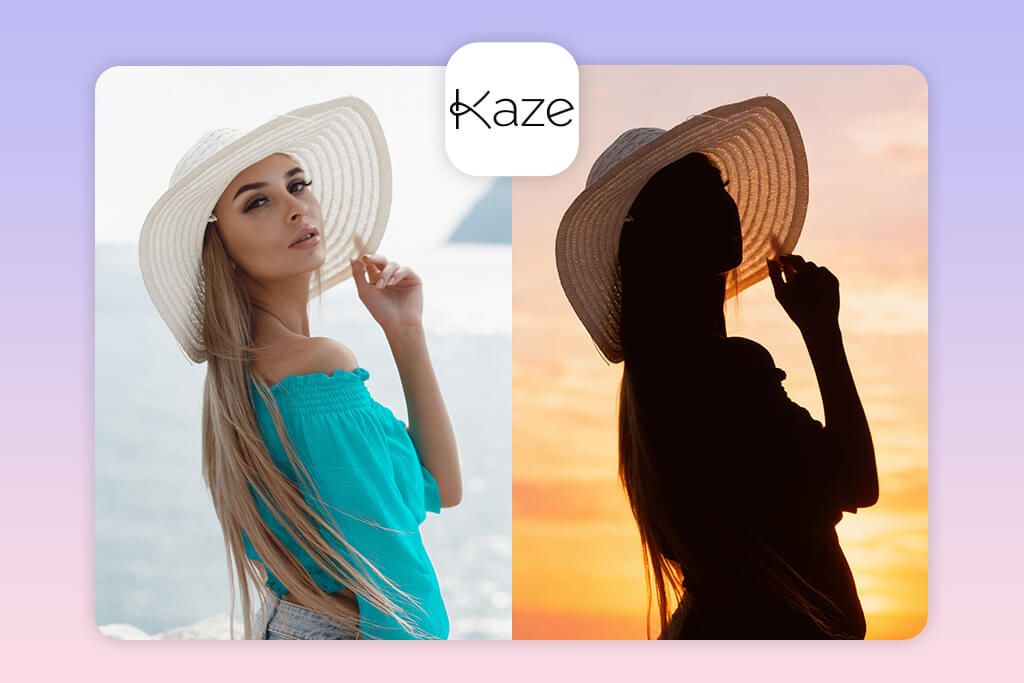
2. Kaze
- Sharp and precise edge detection
- AI accuracy speeds up the process
- Clean, minimal interface
- High-quality exports
- Suitable for any type of subject
- Few manual adjustment tools
- No option to change background colors
Kaze AI became popular really quickly, so I wanted to check it out for myself. I’ve tried a lot of AI silhouette photo apps that claim to give perfect results, but most of them either make the outlines too simple or blur the small details. Kaze was different – right away, I could see how sharp and clean the silhouettes were. I began with a portrait, and then just for fun, I uploaded a photo of a ceramic vase. The app even captured the thin curves of the handle with surprising accuracy.
The app is really easy to use – you just upload a photo, wait a few seconds, and the silhouette is done. I liked that I didn’t have to change any settings; the AI handled everything. What impressed me most was how clean the edges were. The result looked professional enough to use for something like product packaging or a print project. I also tried saving it as both JPG and PNG, and both looked great with no loss in quality.
If I had to point out one small downside, it’s that you don’t have much control over the final result – you can’t adjust the contrast or fix the edges manually. But to be fair, that simplicity is also what makes Kaze AI so nice to use. It’s quick, reliable, and doesn’t require any design skills. For anyone who just wants a clean silhouette for things like crafts, greeting cards, or social media – without dealing with complicated software – it’s a perfect “upload and done” tool.
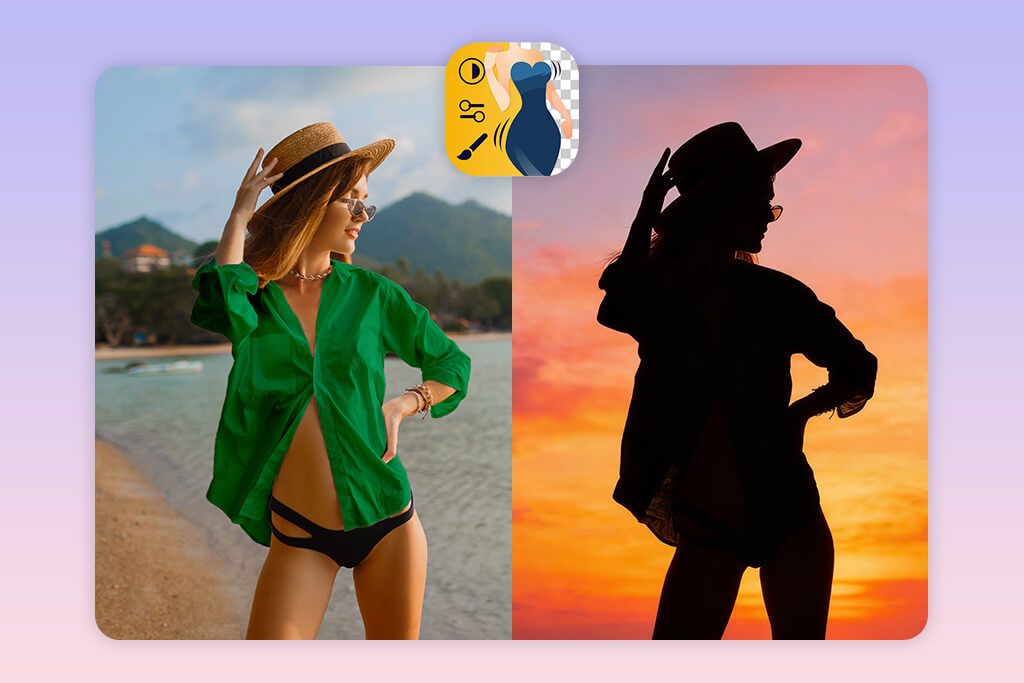
3. Fix The Photo Body Editor & Tune
- Edited by professional human retouchers
- Custom requests available
- Strong focus on fine details
- Quick delivery time
- Natural, high-quality results
- Paid required after the first free photo
- No immediate option
What makes this app different is that real people, not just computer programs, do the editing. I opened the app, hit “Upload Photo,” and picked a full-body shot I took outside. Then, in the “Custom Request” box, I wrote a quick note asking for a clean silhouette – bold, completely black, with a transparent background so I could use it for a poster. The final result was sharp, well-balanced, and showed a careful attention to shape and outline that only a person could really capture.
Right away, I could tell this wasn’t done by a machine. The person editing took the time to smooth the edges while keeping the shape accurate. The silhouette looked natural and kept details that AI usually flattens out. I also liked that I could ask for extra changes, like adding a light shadow or adjusting the background – something automatic apps just don’t offer. It’s also good to know they’re working around the clock, so you can upload a photo anytime and get it back the same day.
Of course, getting that kind of detailed work from a real person isn’t free, and that makes sense. The price is actually quite fair: $0.99 for three photos, and your first one is completely free. Honestly, for real editing done by hand, that’s almost nothing.
So yes, you pay a small amount, but in return you get professional-quality work from people who understand things like lighting, shape, and tone – not just automated tools. If you care about quality or need silhouettes for print or branding, this photo to silhouette app is definitely worth it.
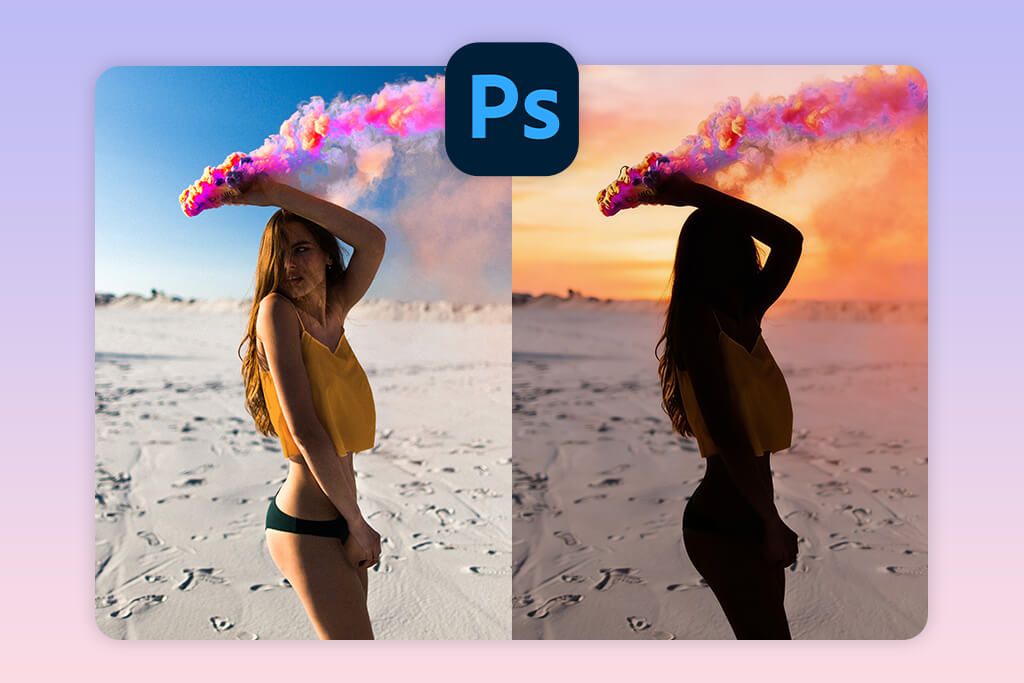
4. Photoshop for iPhone
- Built-in Firefly AI support
- Precise subject detection
- Studio-level output quality
- Advanced manual adjustment options
- High-resolution export
- Takes time to learn
- Free version has limited features
Photoshop has long been seen as an app that photographers use, which is why many people find it intimidating. But after testing Photoshop for iPhone, I noticed how much Adobe has simplified the mobile experience. The interface feels far more user-friendly than the desktop version, and you don’t need years of practice to get started. The biggest change is the integration of Firefly AI. With it, you don’t have to master complicated selections or masking tools just to create a silhouette – the process is much more straightforward now.
I opened this silhouette generator, hit “Create New,” and uploaded a portrait photo. Then I went straight to Select Subject, and the app quickly highlighted the person with surprising accuracy. Next, I tapped Mask, reversed the selection, and filled the subject with solid black using the Fill tool. To finish, I removed the background with one tap and saved the image as a PNG. The whole thing took just a couple of minutes – way faster than doing it in Photoshop – and the edges were clean enough for print.
What I appreciate most about Photoshop for iPhone is how it combines automation with manual control. Firefly AI handles most of the work, but I can still fine-tune the edges using tools like Refine Mask when needed. The only drawback is that some advanced features require a subscription, which casual users might not need. Even so, if you want to create a precise silhouette on iPhone, this free Adobe app remains a reliable choice.
5. Pixelbin
- No prompts required
- Accessible in any browser
- Quick automatic processing
- Sharp, clean silhouette edges
- Perfect for fast design tasks
- No manual adjustments
- Limited creative flexibility
A colleague recommended Pixelbin to me – they often work with quick mockups and browser-based tools. I liked it right away because there was nothing to install. I just opened it in my browser, clicked “Upload Image,” and that was it. No pop-ups, no settings, no instructions to figure out. The tool processed the image instantly and returned a clean silhouette. The whole experience felt refreshingly straightforward.
I dropped in a product-style photo and let Pixelbin run fully on its own. A few moments later, it delivered a crisp silhouette that fit perfectly into a test poster design. What caught my attention was how reliable the output was – no awkward cropping, no rough edges. I didn’t need to steer the tool or fine-tune any controls, which makes it ideal for anyone who needs to create silhouettes quickly for business visuals, custom stickers, or social media avatars.
That said, Pixelbin focuses on speed, not customization. You won’t find manual tools or creative filters, which might feel limiting if you’re used to more control. But as a simple, prompt-free silhouette generator, it does exactly what it promises – clean, reliable results with hardly any effort.
FAQ
- What makes an app easy for beginners to use?
A good silhouette maker should let you go from uploading a photo to downloading the result in just a few steps. From what I’ve seen, the best tools use automatic subject detection and simple preset options instead of complicated settings. A clean layout and instant previews also help a lot, especially for people just starting out. When the process is visual and easy to undo, users feel more comfortable trying things on their own.
- Can I make a silhouette from any picture?
Technically, you can, but not every picture will give you a good result. Photos with good lighting, clear outlines, and simple backgrounds work best. When I tried using pictures with dark shadows or overlapping shapes, the silhouette often ended up looking unclear or messy. Picking the right photo is just as important as picking the right app.
- How good are AI silhouette makers compared to doing it by hand?
AI silhouette tools have gotten much better and can handle most simple images really well. They’re especially helpful when you need quick results for things like social media, crafts, or basic designs. But AI can still have trouble with fine details like hair or complicated shapes. Editing by hand gives you more control, but it also takes more time and practice.
- Is it possible to make a silhouette without desktop software?
Yes, you can definitely make a silhouette without using a computer. It’s actually a lot easier now than it was before. There are several mobile apps that let you create silhouettes right on your iPhone using built-in AI tools. I’ve tried a few of them myself, and the whole process from uploading a photo to saving the final result only takes a few minutes. For most people, you don’t even need desktop photo editing software for photographers anymore.
- Is it worth hiring a professional to create a silhouette?
It really comes down to how important the final result is. If the silhouette is for print, branding, or a special gift where details matter, a professional can deliver sharp edges and accurate proportions. Careful manual editing also helps avoid typical AI errors. For commercial or high-quality use, working with a pro often saves time and ensures consistent, polished results.