20 Essential Tips for Taking Amazing Travel Photography

Very often tourists return from their adventure with thousands of travel photos stored in their cameras. But one can hardly call them ideal. Of course, the camera and photographic talent do not always play a decisive role, and it will be very useful to improve your knowledge, especially if you are an avid traveler.
WeEdit.Photos team will share some useful tips on how to take professional pictures on iPhone and camera to allow you to enjoy the process.
1. Use Compact Equipment

Camera. Lightweight and ergonomic design are the major criteria that you should take into account when choosing a camera for capturing your traveling adventures. Fujifilm X-T4 is one of the recommended models.
It is lightweight, small, turns on quickly, and takes pictures with excellent colors. The camera has a compact design so it fits a travel backpack with ease. Besides, it features a long battery life offering 10 hours of continuous operation.
Fujifilm XF 23mm f/1.4 is probably the most optimal lens for this photography genre available on the market today.
In general, as our experience shows, no matter what camera you use, the best lens for travel photography has a focal length of 35mm, considering the crop factor. That is, if you have a camera with a cropped matrix, then it can be any lens with a focal length of 23 mm. Speaking about full-frame models, 35 mm is ok.
Pro Tip: I also recommend carrying some extra battery to your camera with you. Especially, if you are going on an excursion that will take you not a couple of hours, but a whole day.
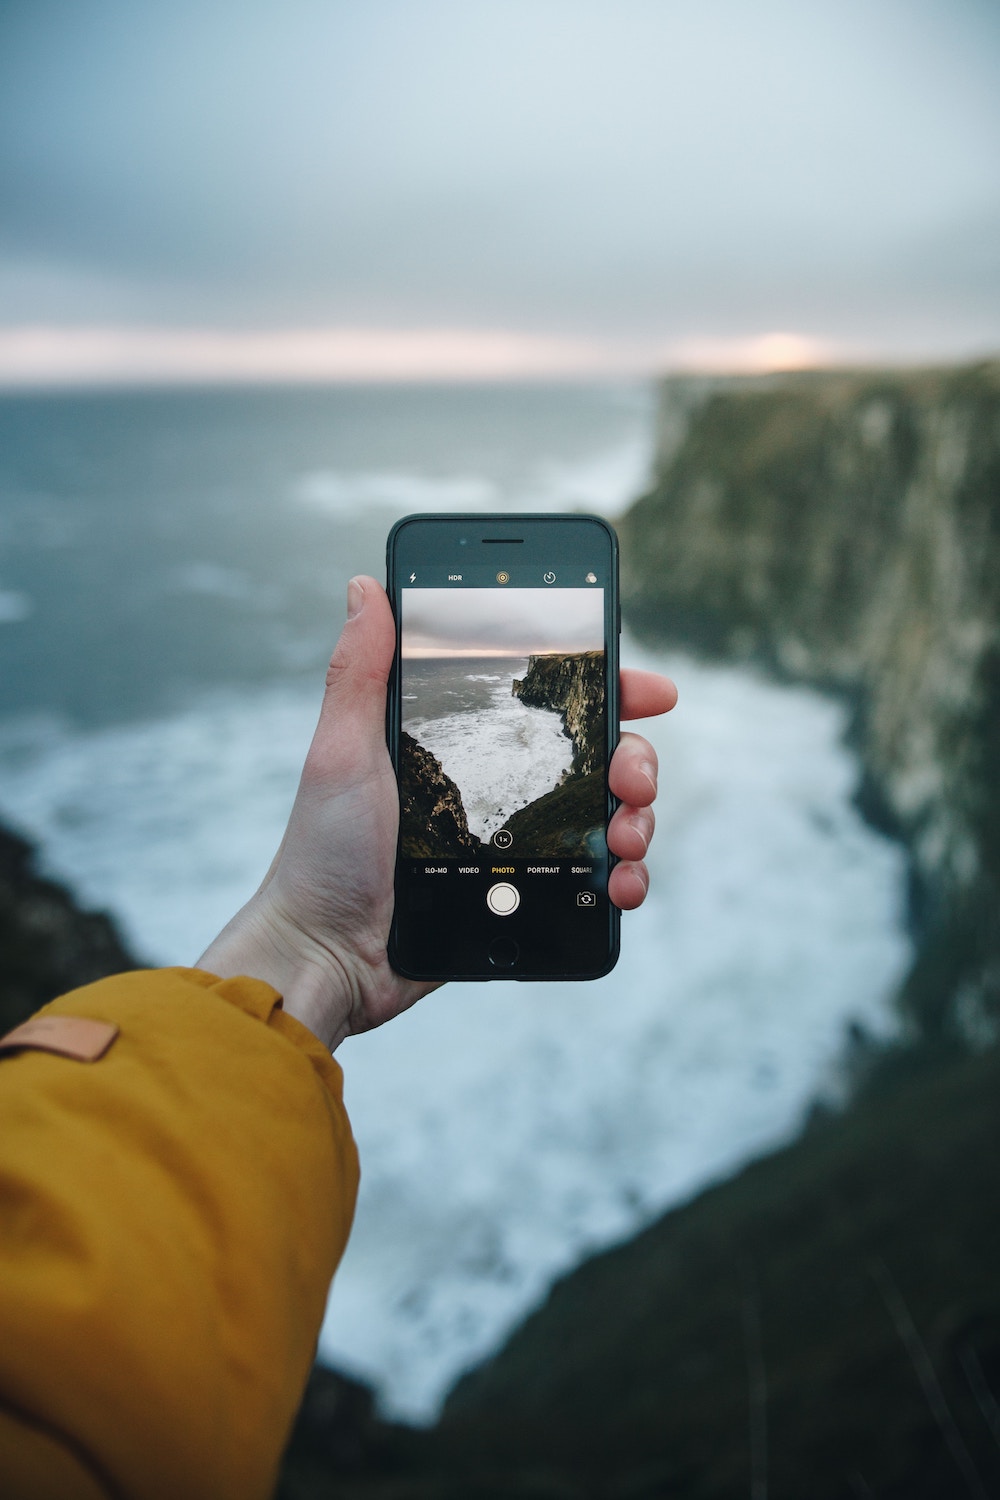
Phone. iPhone cameras (models X or higher) can produce amazing shots in virtually any shooting condition. Nowadays you can take gorgeous portraits on your smartphone, blurring the background, take great pictures in an unflattering light, during rain, and even underwater!
To take impressive travel pictures featuring falling water, night traffic, spurts of flame, or fast-moving people, use Live Photos mode. By applying the “Long Exposure” effect to ready-made photos, you can blur moving objects making them translucent.
2. Make Sure Photos Are NOT Blurred
To eliminate camera shake, in shooting scenarios where slow shutter speeds are required, use a tripod. It is possible to reduce sensor noise by keeping your ISO low, while smaller apertures ensure that more of the image is in focus.

Camera. We advise you to take a closer look at such models as Peak Design Travel Tripod and SmallRig Lightweight Travel Tripod. They have compact and robust bodies specially designed for travel photographers with digital cameras.
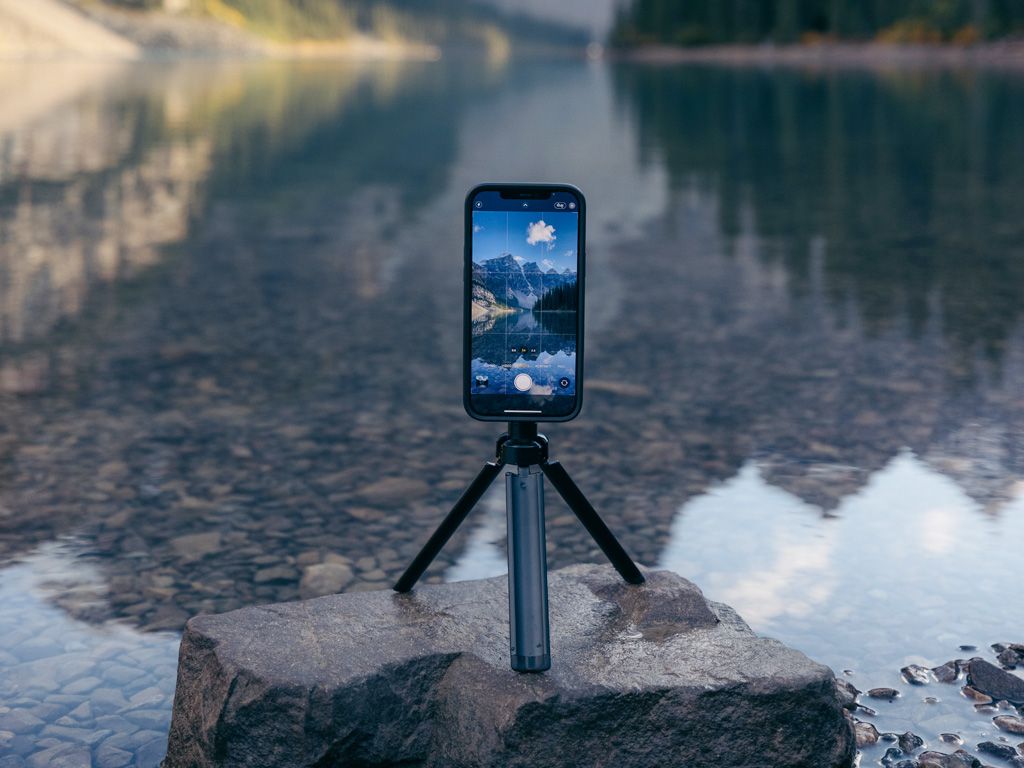
Phone. If you prefer shooting on a smartphone, PHOPIK Lightweight Phone Tripod and Aureday 67” Phone Tripod are among the best options.
3. Do Pre-Trip Location Scouting
When planning a photoshoot on a certain destination, investigating this place in detail will not be superfluous. Discover hidden spots on TikTok or Instagram, landmarks that are nearby, define the time when the location is not so crowded, etc.
It will be also helpful to learn more about the traditions the locals have. The more you discover about the place where you are going to conduct a photo shoot, the more concentrated you will be when traveling there and taking impressive pics.
Instagram, TikTok, Pinterest, and Google Image Search are some of the greatest means for conducting your travel photography research. By browsing these resources, it is easy to find out the exact location of places of interest. However, when it comes to creating a “shot list”, simple postcards are also helpful.
Speaking about more advanced location-scouting apps and sites for shooters, Atlas Obscura, PhotoPills, MapAPic, and TripBucket Mobile are probably the most popular on the list. Although these apps are quite unusual and ignored by many users, they are worth trying.
4. Сhoose the Time of Your Photoshoot
Good illumination is crucial for travel photography. Try to conduct your photo shoot when the light is warm and soft (in the morning, for example) to produce eye-catching pictures.
Investigating the landmark in the early morning is more advisable for another reason: you are unlikely to meet other tourists or shooters at this time.
Are you eager to take a memorable pic of Chichen Itza or the Taj Mahal without hundreds of other people in the background? Head to the landmark on the sunrise to make it a reality.

Note that you should not necessarily shoot in the early morning, as sunsets provide flattering light as well. Try to catch these famous “golden hours” (one hour after sunrise or before sunset) to make sure that your pics are imbued with soft light and feature attractive shadows.
Experienced photographers are also familiar with the term “blue hour” (which is the hour after sunset or before sunrise) when the sky is getting lighter, but there are still many city lights on the horizon.

If you want to tweak your pics somehow, turn to Weedit.Photos specialists, and an amazing result is guaranteed.
5. Configure Your Camera Properly

Camera. When shooting landscapes while traveling, it is very important to achieve the maximum depth of field, so give preference to the “Av” mode (Aperture Priority mode).
Take photos in RAW format. This mode saves as much information about the image as possible, which may be useful in the future for adjusting the basic image parameters. On a sunny day, it is better to use a filling flash – it will optimally highlight the shadows, and make the picture brighter and more saturated.
When viewing photos, also pay attention to the histogram to avoid overexposure and underexposed areas in them.
Try to take images standing as close as possible to the subject to get beautiful pics of the highest quality.
As a rule, images shot on a cloudy day are gray and lack details, so the right exposure settings are pivotal in this scenario. Adjust it to + 0,5 – +1 EV. When shooting light objects, for example, people in white clothes, open the aperture by 1-2 steps more.
Phone. If you shoot with your smartphone, switch on HDR mode by heading to Settings > Camera and choosing Smart HDR.
6. Learn About Composition

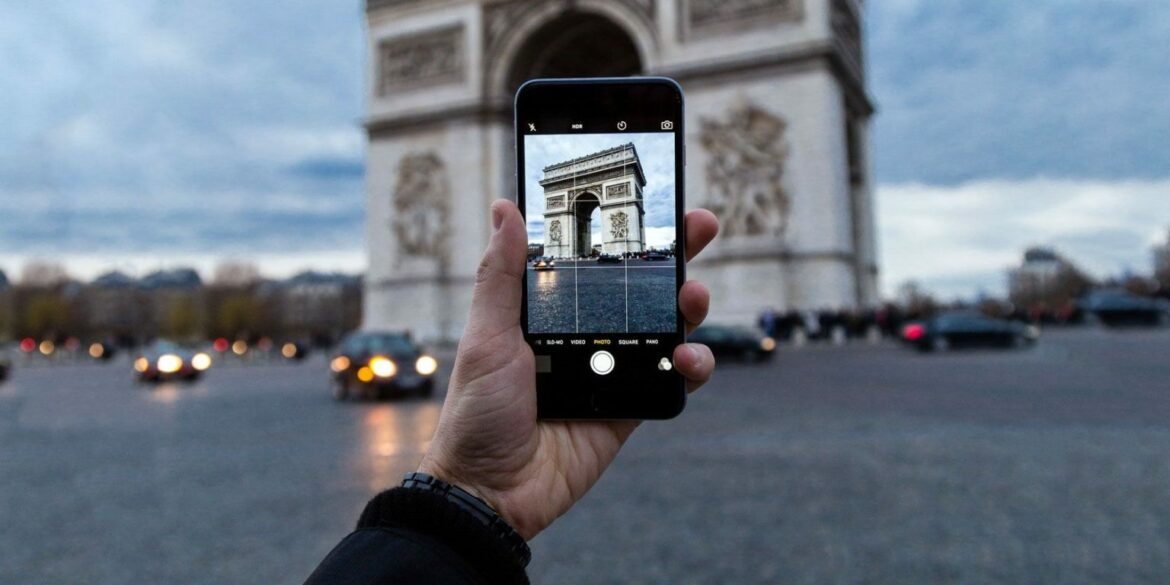
According to the rule of thirds, a pic should be divided into nine equal squares. Fortunately, all modern cameras and smartphones have this grid line feature in-built into their display options.
Camera. To activate this grid on your camera, find the <MENU> button on the device. Find select [Viewfinder display] under [ ] tab and hit < >. Choose [Grid display], then hit < > Select [Show], then press < >.
Phone. To make this handy grid appear on your iPhone camera, launch the Settings app on your iPhone. Find and click Camera and tap on the Grid option, which is under Composition. The same concerns an Android smartphone.

A photographer’s task is to align people or points of interest with the grid lines to achieve a perfect composition.
The rule of thirds is a great technique that can make the image more pleasing to the eye improving the balance of your images. So, incorporating this method into your photography is a brilliant idea.
Leading lines that naturally guide the viewer’s eyes from one element of the picture to another are also helpful.
7. Shoot From Non Standart Angles

Usually, photographers take photos from a standing position, as this is how we view the world. Such a pose is more natural for our body, therefore it is the most popular one.
However, to get travel aesthetic pictures, try to experiment by positioning yourself more originally. For example, shoot your subject from above or from a low angle. Do not be too lazy to sit or lay on the ground to capture beautiful and eye-pleasing scenes.
Playing with a focal length or looking inside and underneath your subject would be a good idea as well.
8. Always Do at Least Basic Post Porduction
Virtually all images you see in your favorite travel publications have been enhanced by photographers at the post-production stage. This is because not all camera models can render colors properly or take shots with perfect lighting.
Camera. You’ve probably heard about Adobe Photoshop, but this tool is rather for real professionals, as an average person will definitely struggle to figure out how to use it. Newcomers had better turn their attention to downloading Adobe Lightroom Free, which is a great option for beginners who are eager to bring their photography to a new level.
However, if you feel that you are skillful enough to edit your photos in Photoshop, benefit from its ‘Creative Cloud’ package, which costs just $10 per month. Try a 7-day free trial to check its main functions.
On the other hand, you can use such photo editing software as iPhoto or GIMP on your PC too.

Regardless of your level of proficiency, turning to digital retouchers from Weedit.Photos is a good decision too. It will let you save time on monotonous editing, devoting more attention to your trips.

Phone. Learn about the photo editing apps for Android and iPhone compatible with your phone model. Snapseed is one of the recommended options. It allows for enhancing colors, adding filters, removing unnecessary objects on a photo, etc.
9. Camera + Smartphone = Perfect Travel Gear

If you use a Fujifilm camera, you have the opportunity to download the application of the same name to hook your camera to a smartphone. As for me, the most convenient feature of such apps is remote shooting with LiveView mode. Using it, you can broadcast a picture from your camera to a mobile device and take pictures at once.
This function is especially useful for shooting self-portraits. There is also a simple one-button remote control mode, which is useful when taking pictures from a tripod.
All modern Nikon cameras are also equipped with SnapBridge technology. Canon cameras also have their own application – Canon Camera Connect 3.
10. Look for Inspiration
Viewing the works of professionals is a great way to borrow some interesting shooting ideas from them. Art galleries, museums, and exhibitions are where you can look for inspiration as well.

I recommend checking the works of such photographers as Frauke Hameister, Robert King, Pedro Quintela, Adam Desjardins, and Chris Henry. Their portfolios and original photography style will definitely provide you with some valuable ideas about what kind of shots to take during your next travel.
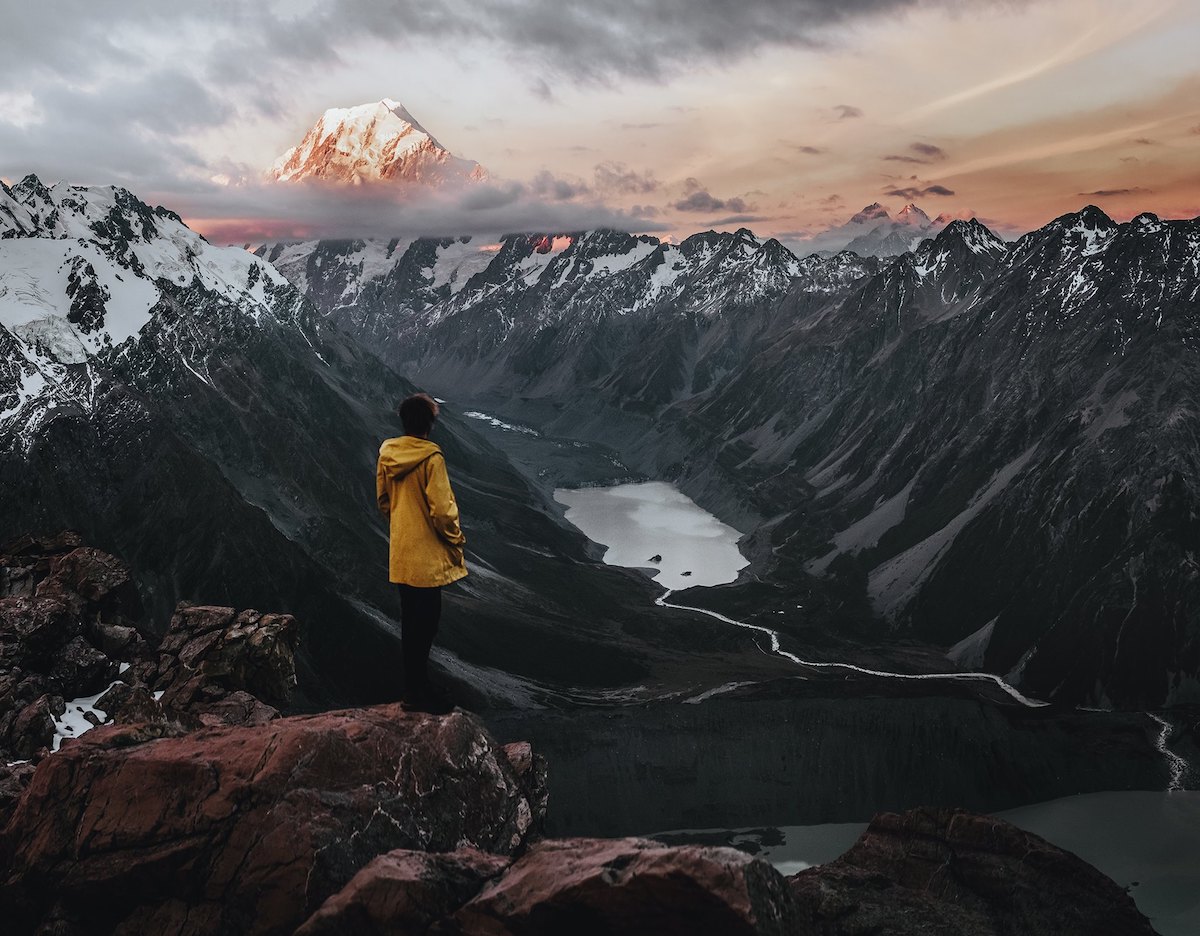
11. Take Photos of Travel Sights

This genre allows you to implement all your mountains, water bodies, valleys, forests, beach photography ideas, and even more. Note that each landmark has its own specific features so it is better to shoot the point of interest from various angles to showcase its beauty.
12. Do Not be Afraid of Shooting People

Here we do not speak about your friends or relatives but about unknown people. Locals, for example, like to pose for tourists, and a great number of famous portrait photographers from all corners of the world is a proof of this. Of course, if a person does not want to be photographed and is clearly not friendly, you should not insist.
13. Shoot Local Animals

To take stunning animal portraits, select a Portrait Mode on the camera and focus on the subject’s eyes. Try to choose an autofocus point on the animal’s eye closest to you to achieve maximum effect.
14. Shoot Cities and Towns

Urban photography has its peculiarities as well. Here it is important to present the city’s vibe, its famous landmarks, skylines, or views, to demonstrate how the city and its residents live. Before conducting your photoshoot, stroll around the location following your map and investigating every point of interest and everything that is around.
15. Play with Shadows
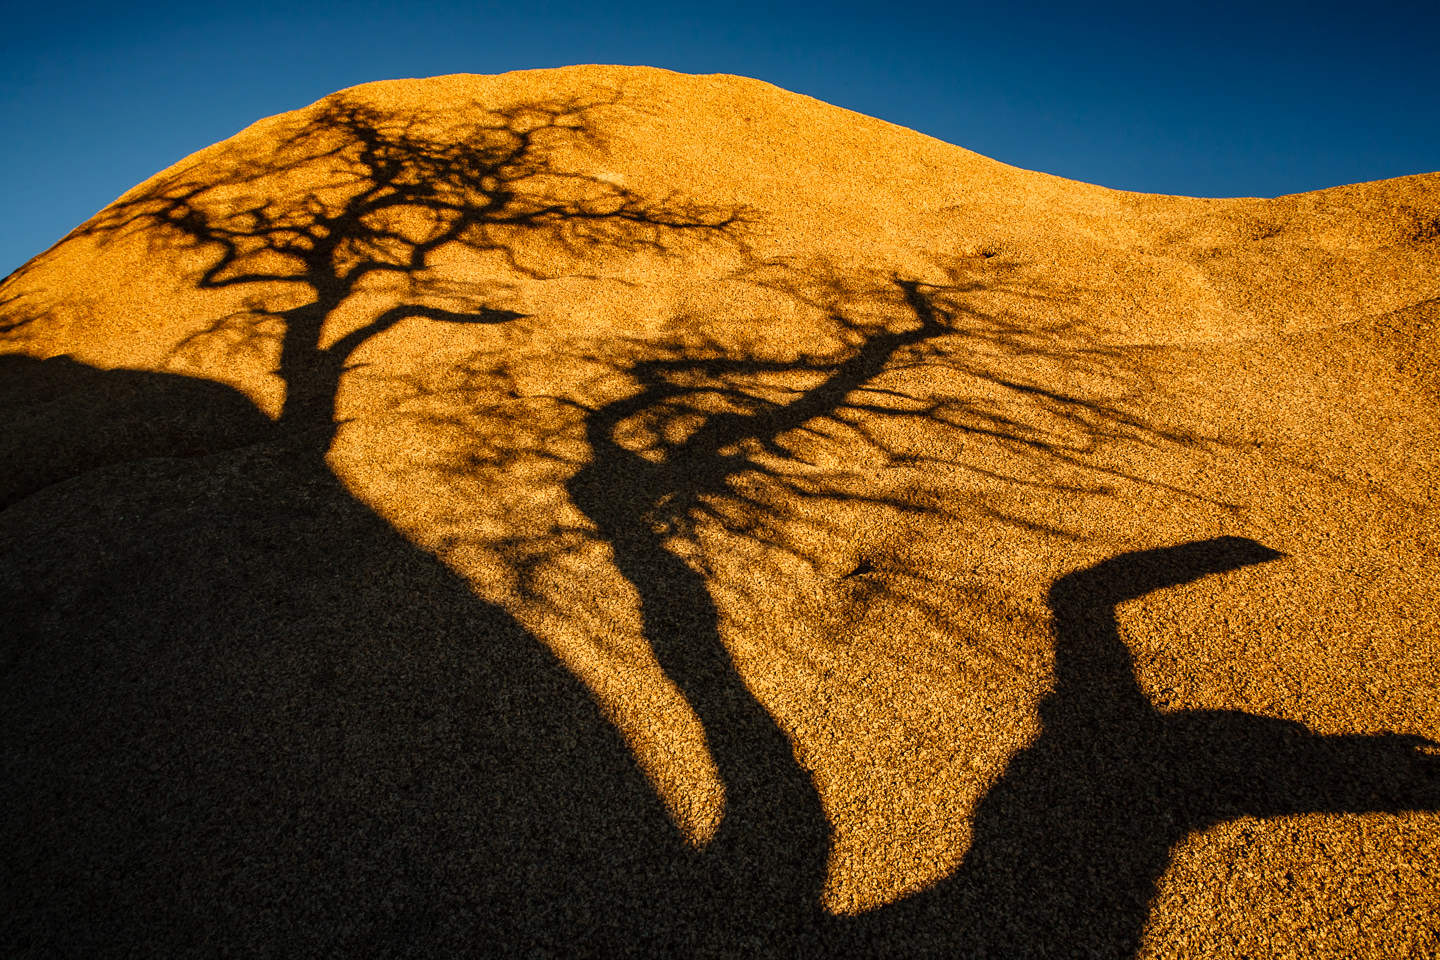
Using the point (center) metering mode, set the exposure to the light area of the scene and observe how contrasting the shadows will look. Experiment with spectacular shadows from palm trees on the beach or try to capture how the sun’s rays penetrate through the window of the cafe where you are having a snack.
16. Take Some Photos At Night
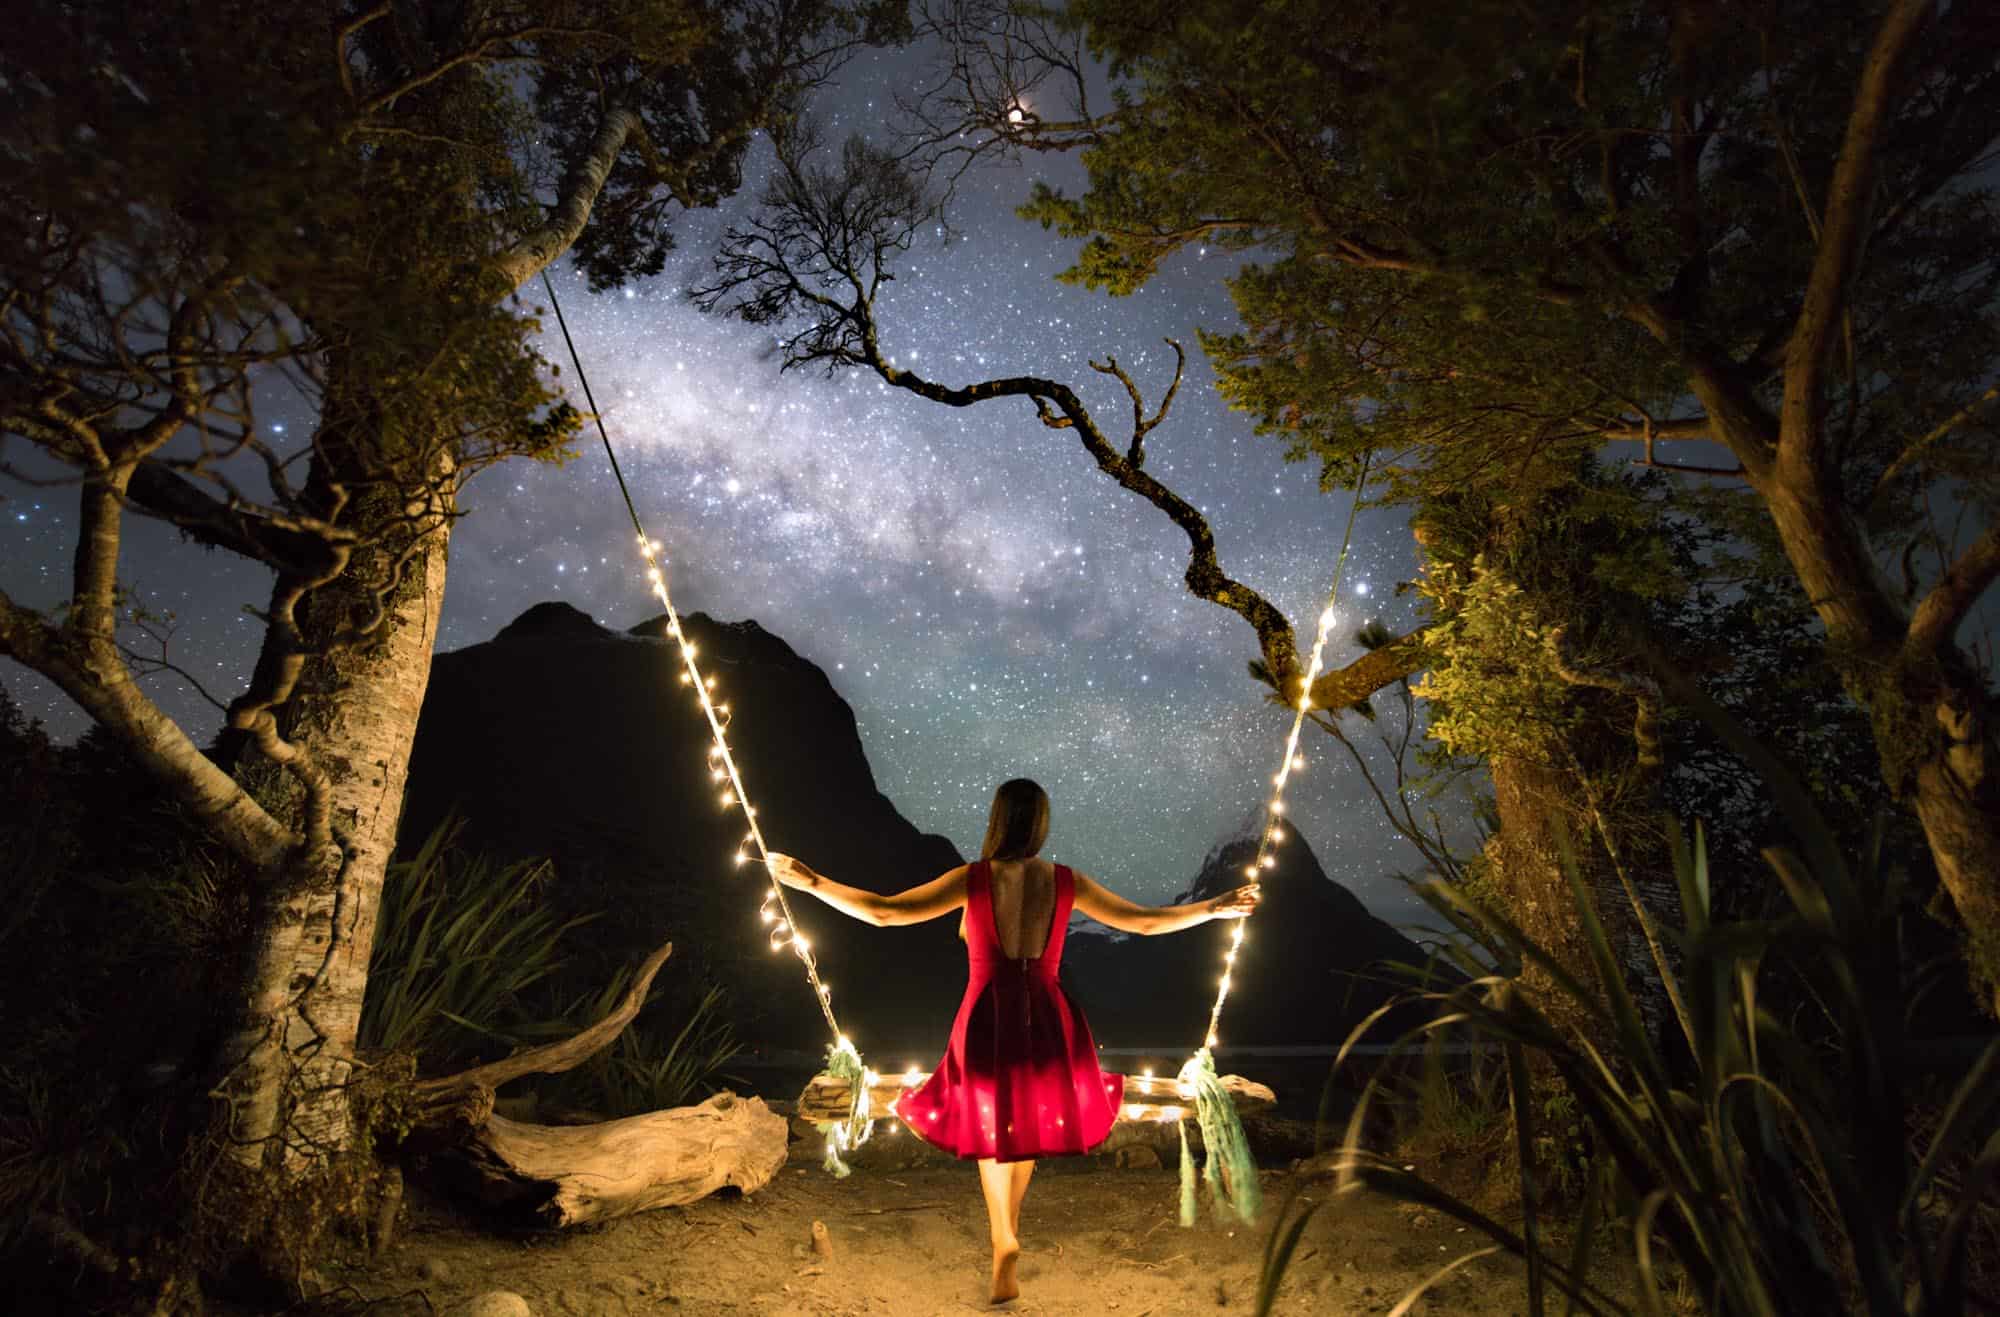
To capture the shimmering night sky, place the camera on a static surface or mount it on a tripod to eliminate camera shake and achieve the best results. By using a slower shutter speed, you will benefit from starlight.
17. Photograph Monuments and Other Buildings

Look at a landmark from various perspectives and define what part of the day and what kind of weather will highlight all the beautiful sides of a construction you are going to shoot. Proper illumination and the right angle are also crucial for taking impressive pics.
18. Do a Photo Report if You Have Time

Showcase how you spend your day during your trip, implementing creative photo poses for women and men. Taking a series of reportage photos is a reasonable decision in this case, as people usually like to view photos showcasing the story of a person’s day in detail.
Moreover, this format allows capturing every meaningful moment of your travel without missing a single one.
19. Frame Your Photos

Take time to learn how to create natural frames in photography. For instance, by leaving some extra space between the sky and mountains, you can achieve such an effect. In this case, the horizon line should be perfectly straight.
Besides, make sure that the model’s feet are not cut otherwise you won’t be able to achieve the required effect. I also recommend capturing the things around the subject to take impressive pics full of interesting details.
20. Do Not Avoid Taking Selfies
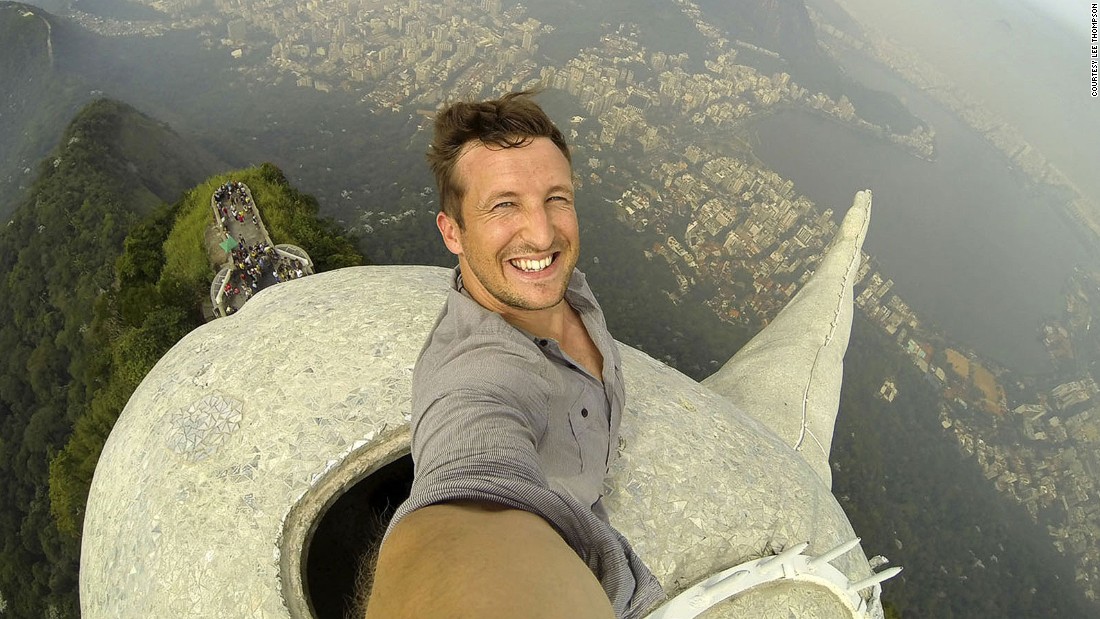
If you are the only one in the company who knows how to take good travel photos, you will have a hard time shooting your friends and relatives constantly. But usually, in this case, a photographer forgets about himself and returns home without a single photo of himself.
So don’t forget to take pictures of yourself. Take unusual selfies and mimic classic and model poses for photoshoot, to have memorable images after your travel ends.
Blurred Photos

There are several reasons why your image can be blurred:
- shooting at high shutter speed – a tripod is needed;
- shooting moving objects – you need to change the settings;
- shaking hands – you should fix the camera – you need a tripod or a monopod.
Uneven Horizon

The simplest way to fix this issue is to take the upper and lower borders of the photo as a reference point. When observing the scene on the screen or in the viewfinder, try to place the line so that it is parallel to the upper and lower borders of the image.
How to avoid: The distances from one and the other ends of the frame to the ends of the sky should be the same. These measurement points will allow the viewers to check how even the horizon is.
«Cropped» Items

Sometimes by concentrating so much on the subject, we miss important details. As a result, a photographer unintentionally crops the peak of the building, and the legs of the model, catching the unnecessary pieces of pillars, garbage cans, and bags instead. Learning how to frame correctly is pivotal for avoiding such mistakes.
How to avoid: It all depends on the situation. Remember that a tall building should be shot vertically from a distance to capture the scenery around.
But note that by increasing the distance, you risk compromising the quality of the image. If some important thing does not fit into the frame, it is better to take several separate photos with fragments of the object and combine them into a panoramic shot.