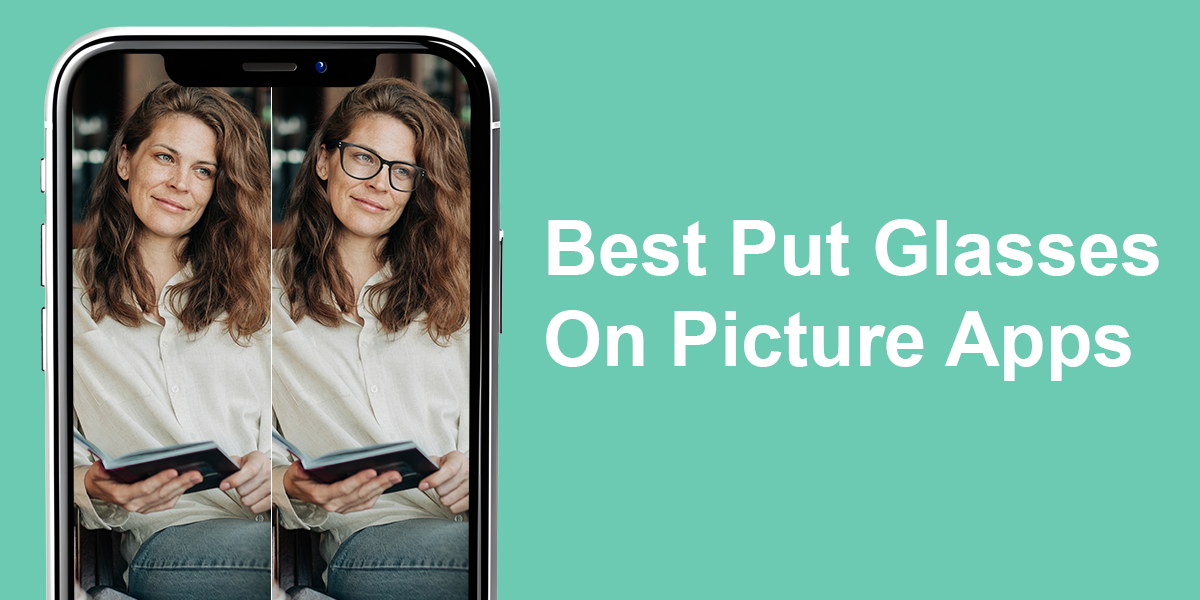
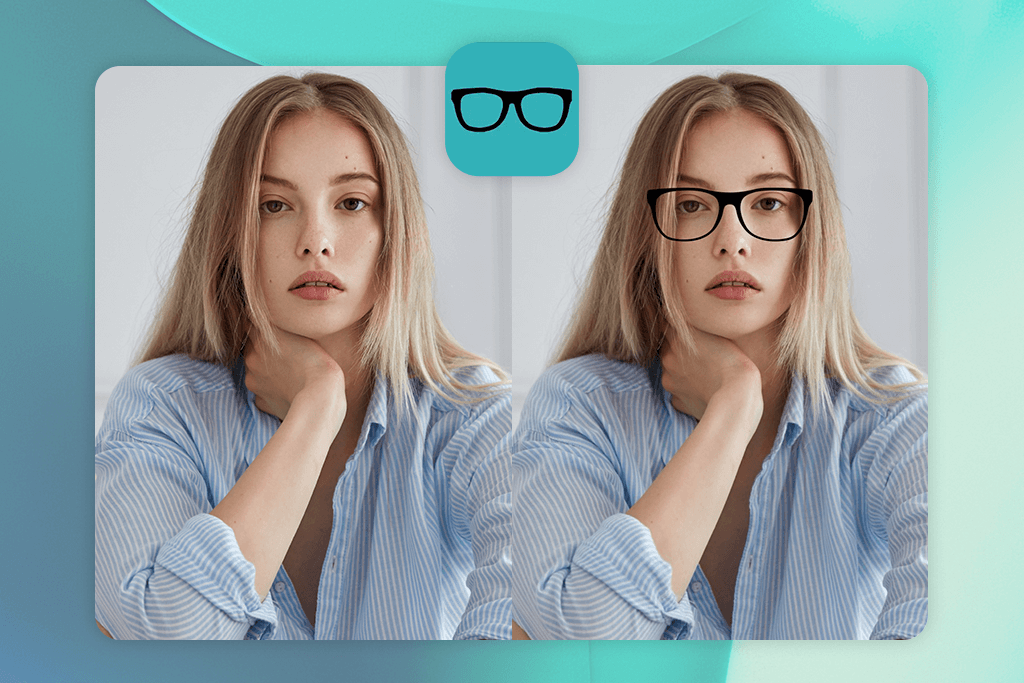
7 Best Apps to Put Glasses on Picture You Should Try [Free]
I tried using a sunglasses photo editor to see how different glasses would look on me, but it was difficult to make them seem real. The frames often didn’t fit the shape of my face, the shine on the lenses looked fake, and sometimes the glasses were just the wrong size. It was frustrating when it was obvious they had just been pasted on.
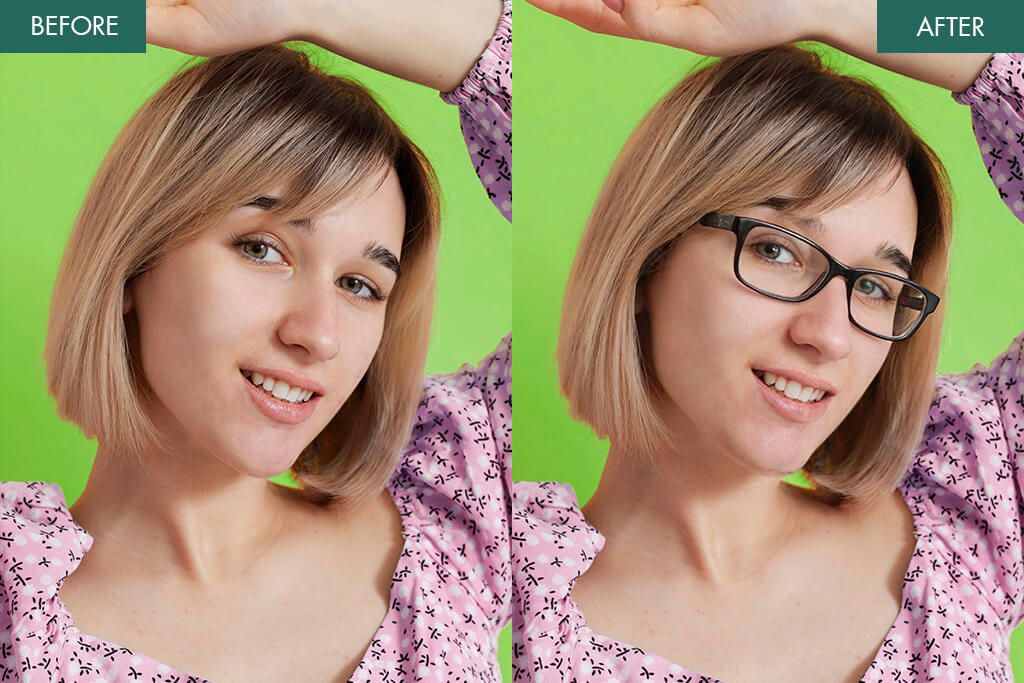
Even with these problems, putting glasses on a picture can quickly change the whole feeling, making it look more fashionable, fun, or professional. I use these apps a lot because they save editing time and let my clients see a new style without any hassle. It’s a useful tool not just for photo editors but for regular people who want to give their social media photos a new look. The technology still has flaws, but since more and more people want to use it, this trend is definitely here to stay.
Tips for Making Glasses Look Realistic on Photos
Putting glasses on a photo can be hard if you want them to look real. Here are some easy tips to help them blend in:
How to Choose the Right Frame Style
1. Match Your Face Shape
- Round face → choose frames with sharp corners or rectangles
- Square face → choose round or oval frames
- Heart-shaped face → choose frames that are heavier or wider at the bottom
- Oval face → almost any frame style looks good
2. Consider Your Features
- Large eyes → choose bigger frames
- Small eyes → choose thin, light frames
3. Think About Proportions
- Your frames should be about the same width as your face. They should not be wider or much narrower.
4. Pick a Frame Color That Suits You
- Choose neutral colors or ones that match your skin for a natural look.
- Choose bright, bold colors if you want to stand out.
5. Match Your Style
- Classic: Timeless shapes like rectangle or round frames for a neat and smart look.
- Trendy: Bright colors, very large frames, or sharp angles to get noticed.
- Sporty: Curved or light glasses that are good for moving around.
- Vintage/Retro: Styles from the past, like cat-eye or pilot glasses, for an old-fashioned feel.
- Minimalist: Frames with no edges or very thin wires for a simple, quiet look.
- Edgy: Uneven, colored, or unusually shaped frames for a bold and daring style.
- Professional: Simple colors and smooth shapes that are good for the office.
- Fun/Playful: Bright shades, designs, or funny shapes for a creative and cheerful look.
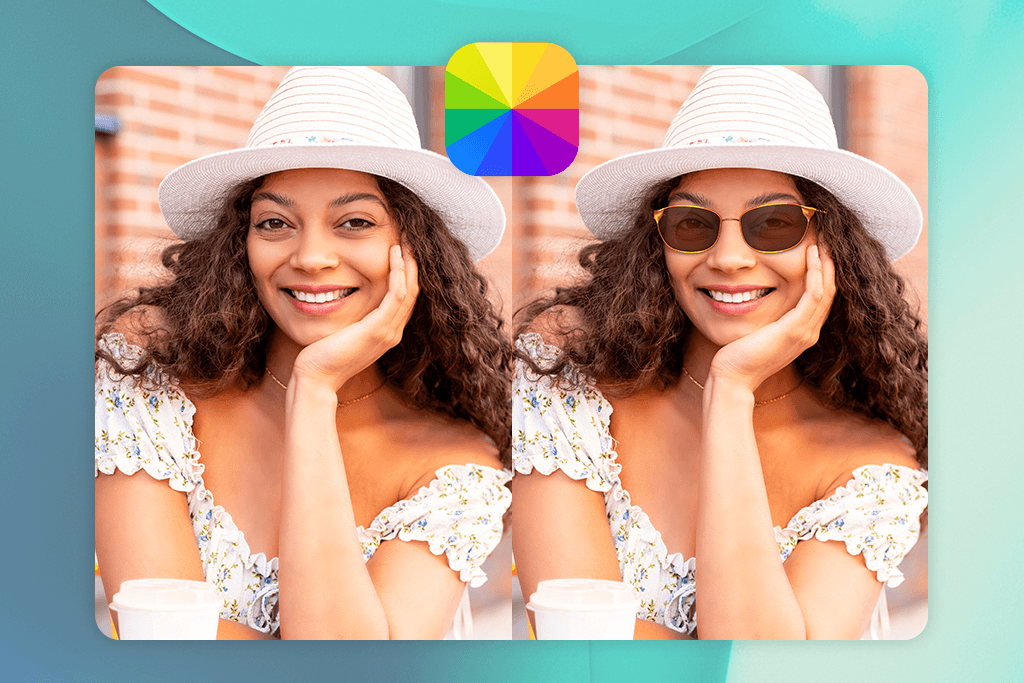
1. GlassesPhotoEditor
Instant results
- Intuitive interface
- Tons of glasses designs
- Some additional tools, like brightness/contrast
- Multiple ads
- Glasses don’t always sit evenly on the face
When I first opened GlassesPhotoEditor, a 30-second ad played right away before I could try it, which wasn’t a great start. I understand it’s a free app, so ads are normal, but they showed up a bit too often. After that, the app itself was simple to use. I uploaded my picture, picked a pair of glasses, and in just a few seconds, I was able to add glasses to my photo.
I liked the choices available: classic styles, gold fashion frames, hipster glasses, funny ones for jokes, and even sunglasses for summer, and even a kids’ glasses collection. Changing the size, moving the glasses, or adding filters was easy, and I also liked being able to adjust brightness, contrast, blur, or add text for more creative edits. There’s also an option to write text on a pic.
Still, this Android photo editor isn’t perfect. At times, the glasses don’t blend well with the face, and since there are no shadows or reflections, they may appear unrealistic. Plus, the app can only be used on Android devices.
2. Fix The Photo Body Editor&Tune
Glasses look realistic

- Retouching by a human professional
- Can request any style
- Without ads and interruptions
- The first photo is free, with flexible pricing afterward
- Open 24/7 and delivers results quickly
- Lacks search by feature
- The app does not allow users to edit photos themselves
Most apps that let you add goggles to a photo use AI, and the results can look fake. With Fix The Photo, a professional photo editor does the work for you. They carefully adjust the glasses to suit your face, making the final image look realistic and polished.
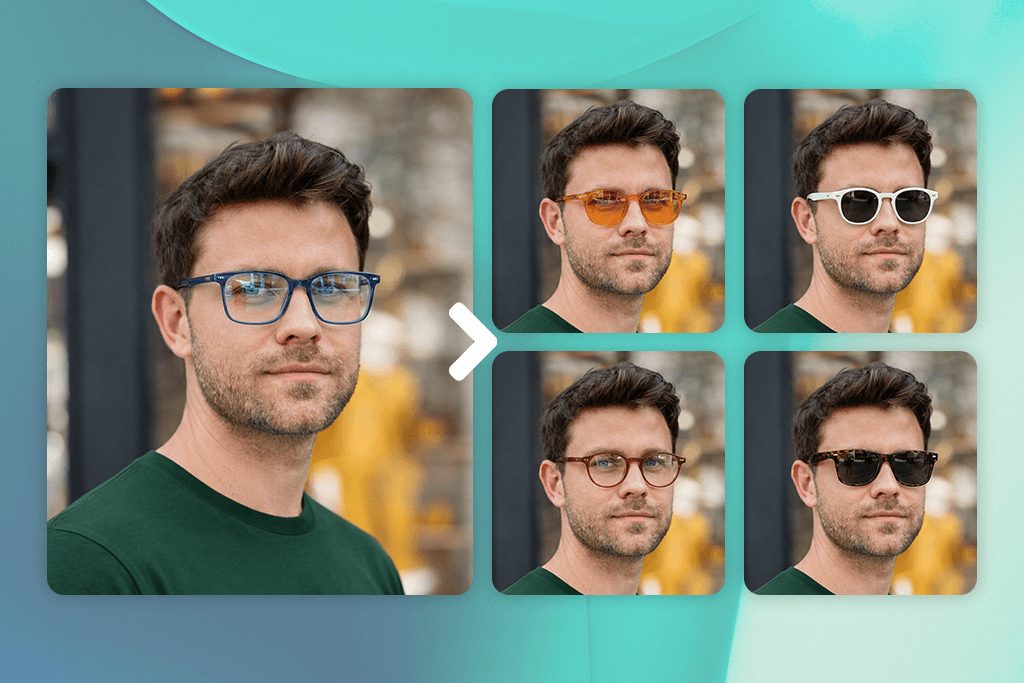
I tried it out by uploading a portrait and requesting several kinds of glasses. The results stood out because the glasses didn’t just look pasted on – they included natural-looking shadows, reflections, and accurate sizing. I experimented with styles like slim metal frames, chunky square designs, aviators, bifocals, goggles, retro hipster glasses, heart and star shapes, horn-rimmed styles, classic shades, spectacles, and mirrored sunglasses. Every pair matched well with my skin tone and the lighting, and even the quirky or playful options looked impressively realistic.
The whole experience was straightforward: just upload your picture, describe the type of glasses you want, and let the editors do the rest. There were no annoying ads, pop-ups, or complicated tools to deal with. The design is simple and clear – all you need to do is say what you’d like.
The first edit comes at no cost, and afterward, the pricing is very budget-friendly, with 5 credits available for only $0.99. In addition to adding glasses, the Fix The Photo Body Editor & Tune app to add eyelashes to photo can apply makeup, shape the body, add beards, enhance lashes, and more. Their team works around the clock, making it a great option for fast edits or social media updates.
This service has a couple of limitations to consider. The editing isn’t immediate, with results typically taking several hours due to the human touch. Additionally, the selection process requires you to describe the frames in words rather than choose from a visual gallery, which may pose a challenge for those unsure of their preferred style terminology.
3. Fotor
AI face recognition
- Speedy and seamless edits
- AI-powered options
- Tweaks brightness, clarity, contrast
- Free version with restrictions
- Options for customizing outside the ready-made presets are quite limited
Using Fotor to add glasses to a picture was very simple. I just chose my photo and picked the glasses I liked. The computer then automatically put them on my face in the right place. I didn’t have to fix the size or position myself, which was a great time-saver. The design of the auto photo enhancer is clear and easy to use, so it’s perfect for anyone, even if you’re new to photo editing.
What I enjoyed most was the wide range of glasses styles offered. I tried sunglasses, aviators, cat-eye glasses, vintage, sporty, or rimless frames, and even goggles, and every pair appeared very lifelike thanks to Fotor’s AI face detection. The lens colors and reflections, from classic black and brown to bright blue, green, and gradient shades, blended perfectly with the photo’s lighting, making the final result look natural and realistic.
However, Fotor has limits for free users, as some of the best glasses and effects are only available in the Pro version ($8.99/month). Sometimes the AI doesn’t place the glasses perfectly, especially on angled or turned faces. Also, while the editor is quick, it can feel a bit restrictive if you want to change frames beyond the preset choices.
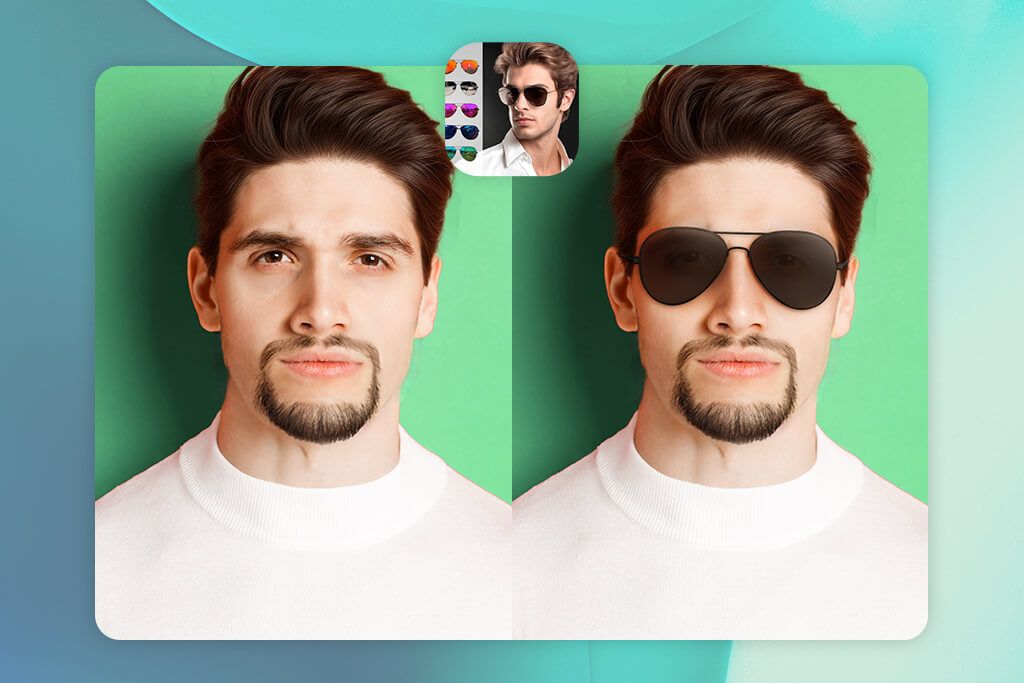
4. Sunglasses Photo Editor
Simple sharing
- Glasses designs are entertaining and creative
- Easy-to-use UI for fast editing
- Comes with simple editing features
- Free version has restrictions
- Results may not always look realistic
I tried the Sunglasses Photo Editor by uploading a picture and looking through its sticker collection. In just seconds, I could put glasses on the photo. The app is straightforward to use, so you can try different styles instantly, even if you’ve never done it before.
The best thing about this app is how many different glasses there are to choose from. It offers a wide range of trendy designs for both men and women, like sporty, luxury, fashion, vibrant, and trendy glasses designs. I tried on classic black frames, colorful mirrored lenses, aviators, and oversized shades. It’s a fun, easy way to create playful photos for your feeds, and you can add other edits like filters or text to make it your own.
However, there are a few limitations. The free version has ads that can interrupt you. It only works on Android phones, not iPhones. Also, the glasses stickers don’t always fit perfectly, especially if your face is turned. You might have to adjust them yourself since the app can’t do it automatically.
5. LightX
Multiple color options
- Uses AI for accurate placement
- Offers a variety of styles
- Includes playful clipart and accessories
- Can be slow with detailed edits
- Free version has only a few style options
I recently tested LightX glasses photo editor, and it was easy to use: I uploaded a JPEG image, selected the spot for the glasses, described the style I wanted, and the AI handled the rest. The AI examines facial features such as the eyes and nose bridge, ensuring each pair of glasses fits seamlessly.
I tried out a variety of eyewear shapes, including aviators, round, cat-eye glasses, square, classic frames, semi-rimless, and trendy oversized styles. The color palette ranged from traditional blacks and browns to striking blues and gradient tints. Being able to adjust dimensions, positioning, and transparency offered immense creative freedom, making it ideal for eye-catching social media content and artistic edits.
A few things to note: adding sunglasses to a photo could sometimes be a bit slow, and you can’t use all the styles for free – this is to encourage you to get the $5.99 monthly subscription. Sometimes the automatic placement was a little wrong, especially if my face was turned, and I had to fix it myself. While this Android and iPhone photo editor is fun and has lots of stickers and accessories, the final look isn’t as natural as what you’d get from a professional photo editing service.
6. YouCam Enhance
Wide range of styles
- Speedy AI processing
- Lenses automatically adjust to the lighting and tones in your photos
- Sleek, contemporary user interface
- Placement isn’t always ideal
- Restricted free plan
Once I uploaded my picture to YouCam Enhance, I selected the AI Replace feature, highlighted my eyes, and entered the type of eyewear I envisioned. Initially, I typed “sunglasses,” and the app instantly placed a realistic, summery pair onto my face. From there, I experimented further – testing circular wire frames, classic aviators, retro monocles, and even playful choices like shattered lenses and sci-fi-inspired goggles.
I could type in any style I wanted, like thick black frames, clear rims, bright colors, or traditional gold metal. The AI made them look real without me having to adjust the size or angle. The app was simple and modern, so it was easy to find and use all the tools.
The sunglasses photo editor had a few issues. The AI didn’t always understand what I wanted, leading to glasses that didn’t match my idea. The placement was also less accurate on angled or shadowy faces. Finally, the free version is very restricted, so you need the $9.99 monthly plan to access most tools.
7. Glasses Color Stickers
Intuitive editing process
- Frames and lenses can be personalized with different colors
- Offers 27 unique eyewear designs
- Easy and fast options to save or share
- Adjusting size and angle manually can be tricky
- Results aren’t always completely lifelike
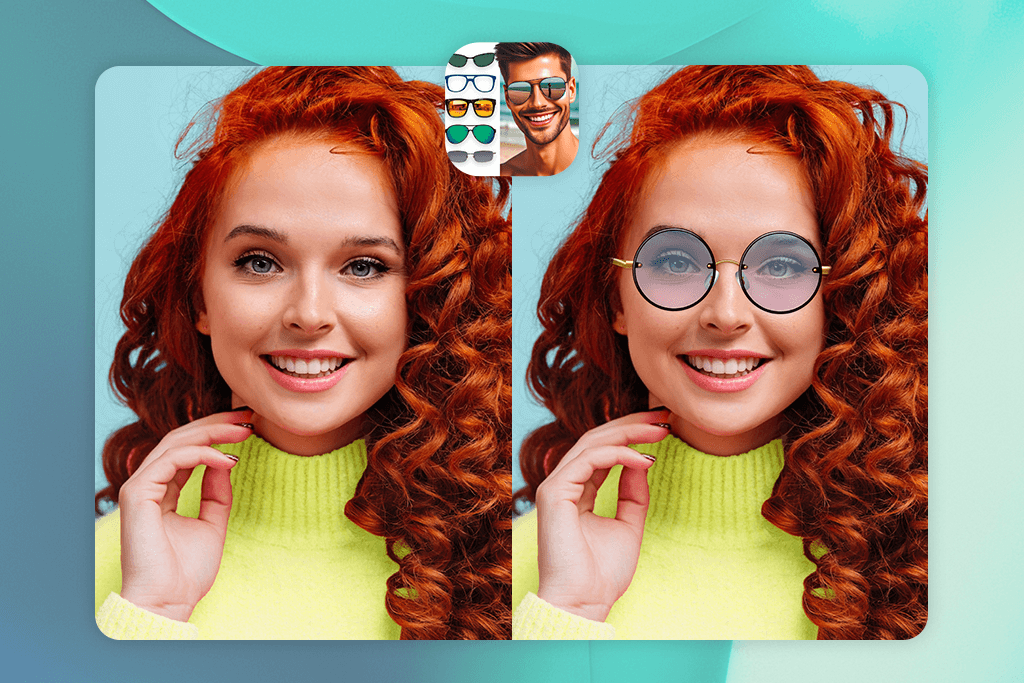
When I explored Glasses Color Stickers, I wanted to see if it could place glasses on my face realistically. The steps were straightforward – I selected a photo, cropped it, and applied a pair of glasses. What impressed me most was the wide selection: aviators, bifocals, delicate wire frames, goggles, trendy hipster styles, heart-shaped, horn-rimmed, classic shades, regular spectacles, sunglasses, and even star-shaped designs. After adding them, I could adjust their size and angle to fit perfectly, then swap out the frame or lens colors.
I liked that I could choose more than just black or brown glasses. I could use fun colors like blue, red, or gradient tones. This let me be creative and make the pictures feel more like my own. The app was also very easy to use, and I could change my photo’s look in just a few taps.
Sometimes, putting glasses on my face felt clumsy, especially if the face wasn’t straight-on. It was difficult to get the angle right. The free app is also very limited, so you have to upgrade to the $4.99 monthly plan for all the options.
FAQ
- Can I actually check how I’d look with different glasses before buying?
Definitely! With apps such as Fix The Photo, Fotor, and LightX, you can see yourself wearing different glasses virtually. This includes classic styles and playful frames like hearts or stars, helping you decide on a look before you spend any money.
- Will the glasses look realistic in my photo?
Yes. Unlike apps that just put a simple sticker on your picture, FixThePhoto has a team of professional editors. They carefully adjust the glasses to match your face’s shape, the light in the photo, and how your head is tilted. This makes the final result look completely natural, as if you were really wearing them. Other apps that use basic stickers, like Glasses Color Stickers, often require you to manually adjust the size and position yourself to make them look correct.
- What’s the difference between AI glasses editors and sticker-based apps?
AI editors, like Fotor and LightX, automatically scan your face and place the glasses on it for a more natural look. Sticker apps, like Glasses Color Stickers, are more for fun and let you place the glasses yourself, but you have to adjust the size and position manually.
- Can I add glasses to group photos?
Yes. You can use a group photo and add glasses to more than one person. Apps that use AI will try to find all the faces and put glasses on them by itself. Other apps let you place and adjust the glasses on each person yourself, which can give you a more precise result.
- Which kind of photos are best for adding glasses to?
Photos that are clear and show you looking straight at the camera work best. This makes it easy for the app or editor to see your eyes and the bridge of your nose. Good lighting is also important because it helps the glasses look natural in the picture.
- What if I want more realistic results or don’t have time to edit?
If you need a very realistic look or are too busy to edit yourself, you can use a professional editing team like Weedit Retouch Service. Their human editors can add any style of glasses you want – from aviators and bifocals to fun, trendy shapes. They make sure the glasses fit your face perfectly and match the lighting and angle of your photo. This creates a high-quality result that is great for professional use, printing, or social media.
- How can I add glasses to a photo online?
It’s easy to do using a website. Just upload your picture to a site like Bylo.ai, Pincel, or OpenArt. These sites let you see how different glasses look on your face realistically, and you don’t need to download an app. You can also change the frame color, add filters, and then download your new photo right away.