Instagram Photo Editing: Tips & Apps

Do you believe you have to be a photography whiz to share stunning stuff on your Instagram feed? Whether you’re just a hobbyist with a camera or a total rookie, you can spruce up your Instagram to match the aesthetics of your beloved influencers.
In this article, we’ll share some handy tips on how to create a jaw-dropping Instagram style. The process won’t be complicated as Instagram comes with a Built-In Photo Editor that is very easy to use. You just need to take a professional photo with an iPhone use an embedded tool for Instagram photo editing, and once you like the result – share it with your followers.
1. Adjust Tool: Crop and Straighten the Photo

You can trim and align images to enhance the overall look and get rid of any distracting elements. It is better to take advantage of an integrated cropping tool that provides popular aspect ratios for posts.
Besides, if you feel like getting a bit creative, there’s the adjust tool. Just tap either the vertical or horizontal option and more that slider to bring any part of your photo, be it the top, bottom, left, or right side, closer to your viewers.
When you are doing Instagram pictures editing, namely photo cropping, you should always remember the rule of thirds. This method involves splitting your image into two horizontal and two vertical lines, and then positioning your key elements right where those lines meet.
2. Filter Tool: Improve Colors

Instagram contains manifold filters that can jazz up your picture in several seconds. You just pick one, apply it to your image, and receive a picture with a whole new look. These filters often affect such parameters as color intensity, contrast and brightness, and sometimes they even tweak the overall color vibe.
“Clarendon” is one of the most popular filters. It gives your pics a cooler vibe and enhances the contrast in a really natural way. But don’t crank up the filter to its maximum strength. Reduce the intensity a bit for a more subtle effect. This way, you’ll keep that pro and natural look intact.
Keep in mind that using the same filter is helpful if you want to create a signature style that your Instagram audience will immediately recognize.
In the upper part of the screen, there’s a magic wand icon, called the Lux tool. Instead of messing around with separate Brightness and Contrast editing tools, you can use the Lux tool to tweak exposure and brightness in one go.
With Lux, you get a slider that goes from 0 to 100. It works like a charm on photos that have spots that are too dark or way too bright. Lux basically brightens up the dark areas (those shadowy parts) and tones down the super bright pieces (the highlights).
3. Lux Tool: Finetune Brightness and Contrast

You can trim and align images to enhance the overall look and get rid of any distracting elements. It is better to take advantage of an integrated cropping tool that provides popular aspect ratios for posts.
Besides, if you feel like getting a bit creative, there’s the adjust tool. Just tap either the vertical or horizontal option and more that slider to bring any part of your photo, be it the top, bottom, left, or right side, closer to your viewers.
When you are doing Instagram pictures editing, namely photo cropping, you should always remember the rule of thirds. This method involves splitting your image into two horizontal and two vertical lines, and then positioning your key elements right where those lines meet.
4. Individual Edit Tool: Tweak Photos Manually

When you’re posting a bunch of photos all together in one post (in a carousel), you can actually tweak each of them individually. Just tap on that little Venn diagram icon in the bottom-right corner of the photo, and there will appear the editing options for each one.
It is important to perform Instagram pic edit of every photo in a carousel separately. If you don’t do this, Instagram will apply the same changes to every single image. Of course, the result won’t look good if your pics were taken in different situations or have different objects depicted. So, it’s definitely worth your time to edit every single photo separately.
5. White Balance Tool: Fix the Color Cast

Fluorescent lighting can be very tricky to work with and it usually yields unflattering results! Typically, your photos will acquire a yellowish tint and colors will become dull.
If you’ve taken a pic indoors and you want to get rid of that yellowish tint, you can use the white balance tool. It’s like a color-corrector that helps you balance out the overall tone of your image.
You can drag sliders up or down to make your picture appear cooler or warmer. There are tint sliders that let you sprinkle in some green or purple shades to give your image a unique touch.
6. Color Vibrancy and Saturation Tool: Adjust Photo Intensity

Looking to spice up your feed with vibrant colors or give it a dreamy, pastel touch? Then, you should leverage saturation and vibrancy tools when performing Instagram photo editing. They are perfect for cranking up or toning down the color intensity in your pics.
However, don’t go overboard. If you raise those sliders too much, your photos may end up looking totally unnatural. The trick is to make subtle adjustments, just enough to enhance the original picture without going over the top.
7. Sharpening Tool: Achieve Crisper Look

If you’re aiming for a sharper, more defined vibe, you should raise sharpness. In case you’re going for that gentle, dreamy feel, drag it down a bit.
Unfortunately, this tool is of little help if your photo contains blurry parts. If your image is severely blurred, any tool can improve the situation.
8. Fade and Vignette: Add a Retro Look
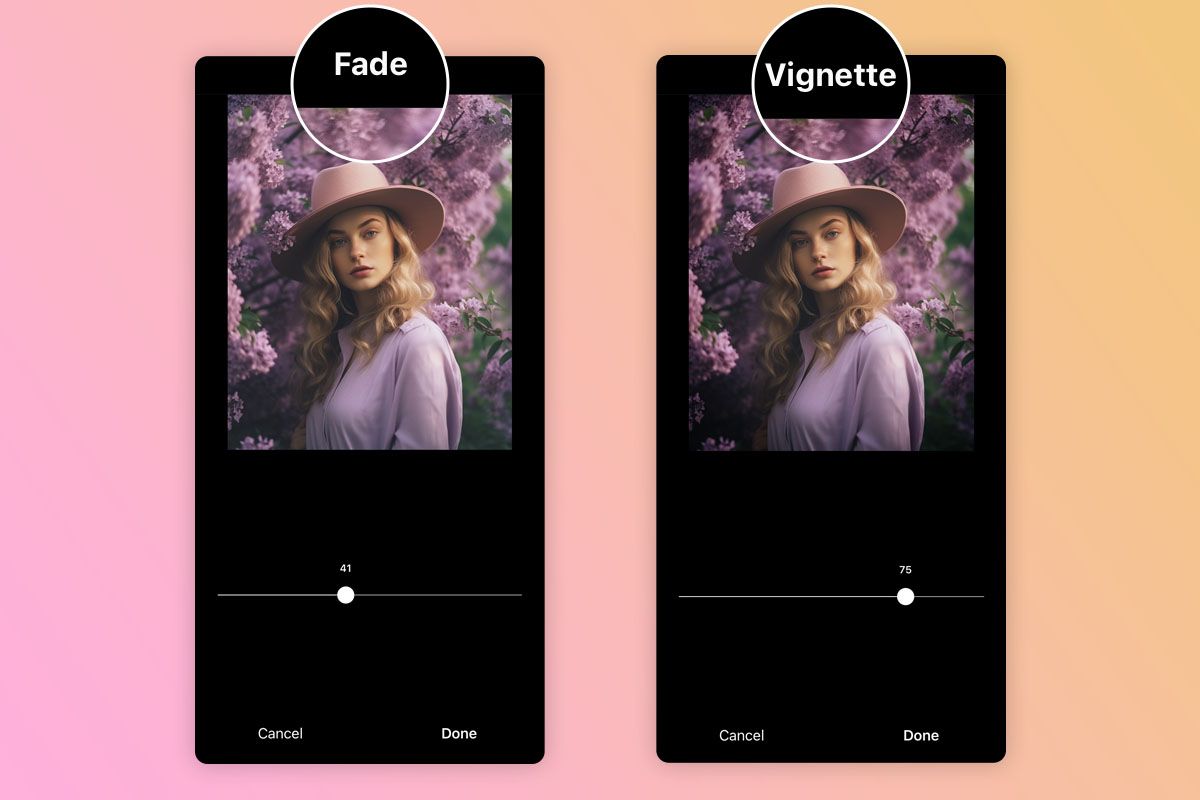
The fade tool makes the contrast mellow and gives off that cool vintage vibe, which can be a real hit if you’re going for that retro look.
The vignette tool darkens the edges of your photo, like putting a spotlight on the center. This is great for making your main subject pop or setting a dreamy mood.
9. Shadows and Highlights Tool: Achieve Perfect Exposure

Tweaking shadows is necessary to bring out the hidden details in the darker parts of a photo. This is especially handy when you’ve taken pictures in dim lighting or in places with lots of shadows. By raising brightness in the shadowy areas, you’re basically balancing out your image, making it way more eye-pleasing.
When you lower the highlights, you actually recover details from those parts of your picture that got overexposed or too bright. This is important because textures in images will be intact and the key areas won’t get washed out.
10. Tilt Shift Tool: Add a Blur

You can use tilt-shift to blur out certain parts of your photo, giving it that cool selective focus. You have control over where, how big, and how strong that blur will be. So, you can make particular objects stand out or even create a fun miniature-like effect.
With tilt-shift, it is possible to add depth and dimension to your photos. By blurring out certain parts in the foreground or background, you can build up layers in your picture, making it look more interesting and dynamic.
Lightroom Mobile – For deep work with face & colors

- Lots of editing tools
- Many presets and profiles
- Smooth integration with Creative Cloud
- Clear UI
- Not for total novices
- Premium version requires a subscription
When it comes to Instagram pictures editing, Lightroom Mobile is a terrific program. Whether you’re tweaking exposure, developing a unique style with personalized presets, or perfecting the geometry for that picture-perfect Instagram shot, you can fully rely on the app. It allows you to achieve the desired precision and enjoy convenience, helping you stay on-brand and maintain that signature look.
With Lightroom Mobile, you can improve and share top-notch photos wherever you are. Besides, it offers cloud synchronization, smooth sharing options, and even handles RAW photo editing. So, if you’re the kind of influencer who craves fantastic visuals and the freedom to create engaging content on the move, opt for this app.
VSCO – Wide a selection of film filters

- Top-notch filters
- Advanced color editing
- 200+ presets
- Suggests presets for images
- Most filters are paid
- Lacks selective edit tools
VSCO is well-known for its fantastic film filters and presets that you can use to give your pictures a stylish and artistic vibe. Thanks to its unique filters, advanced editing tools, and the option to create your very own presets, it is possible to develop a consistent and eye-catching visual style that helps you stick out from the crowd.
If you’re an influencer, VSCO is a great place to get inspired by a lively community of creative folks. You can discover the latest Instagram photo editing tricks and keep up with the newest visual styles. What’s more, you can easily share your creations with your followers, making sure your content looks its absolute best.
Snapseed – For selective edits

- Absolutely free
- Non-destructive editing
- Great photographic filters
- Auto-color correction
- Requires learning
- No auto-save
When you use Snapseed, you get access to some really cool editing tools for fine-tuning every single detail in your photos, whether it’s the brightness or the colors, making sure they match your brand’s style perfectly. One selling point of the program is its selective editing feature, which lets you focus and improve specific parts of your pictures.
In other words, you can give your photos extra pop by boosting colors or brightness exactly where you want them to. So, your photos will acquire a polished, pro-level look that will strike a chord with your followers. Snapseed also makes it super easy to share your edited content with your audience, so they get to see all the hard work you put into making your photos look amazing.
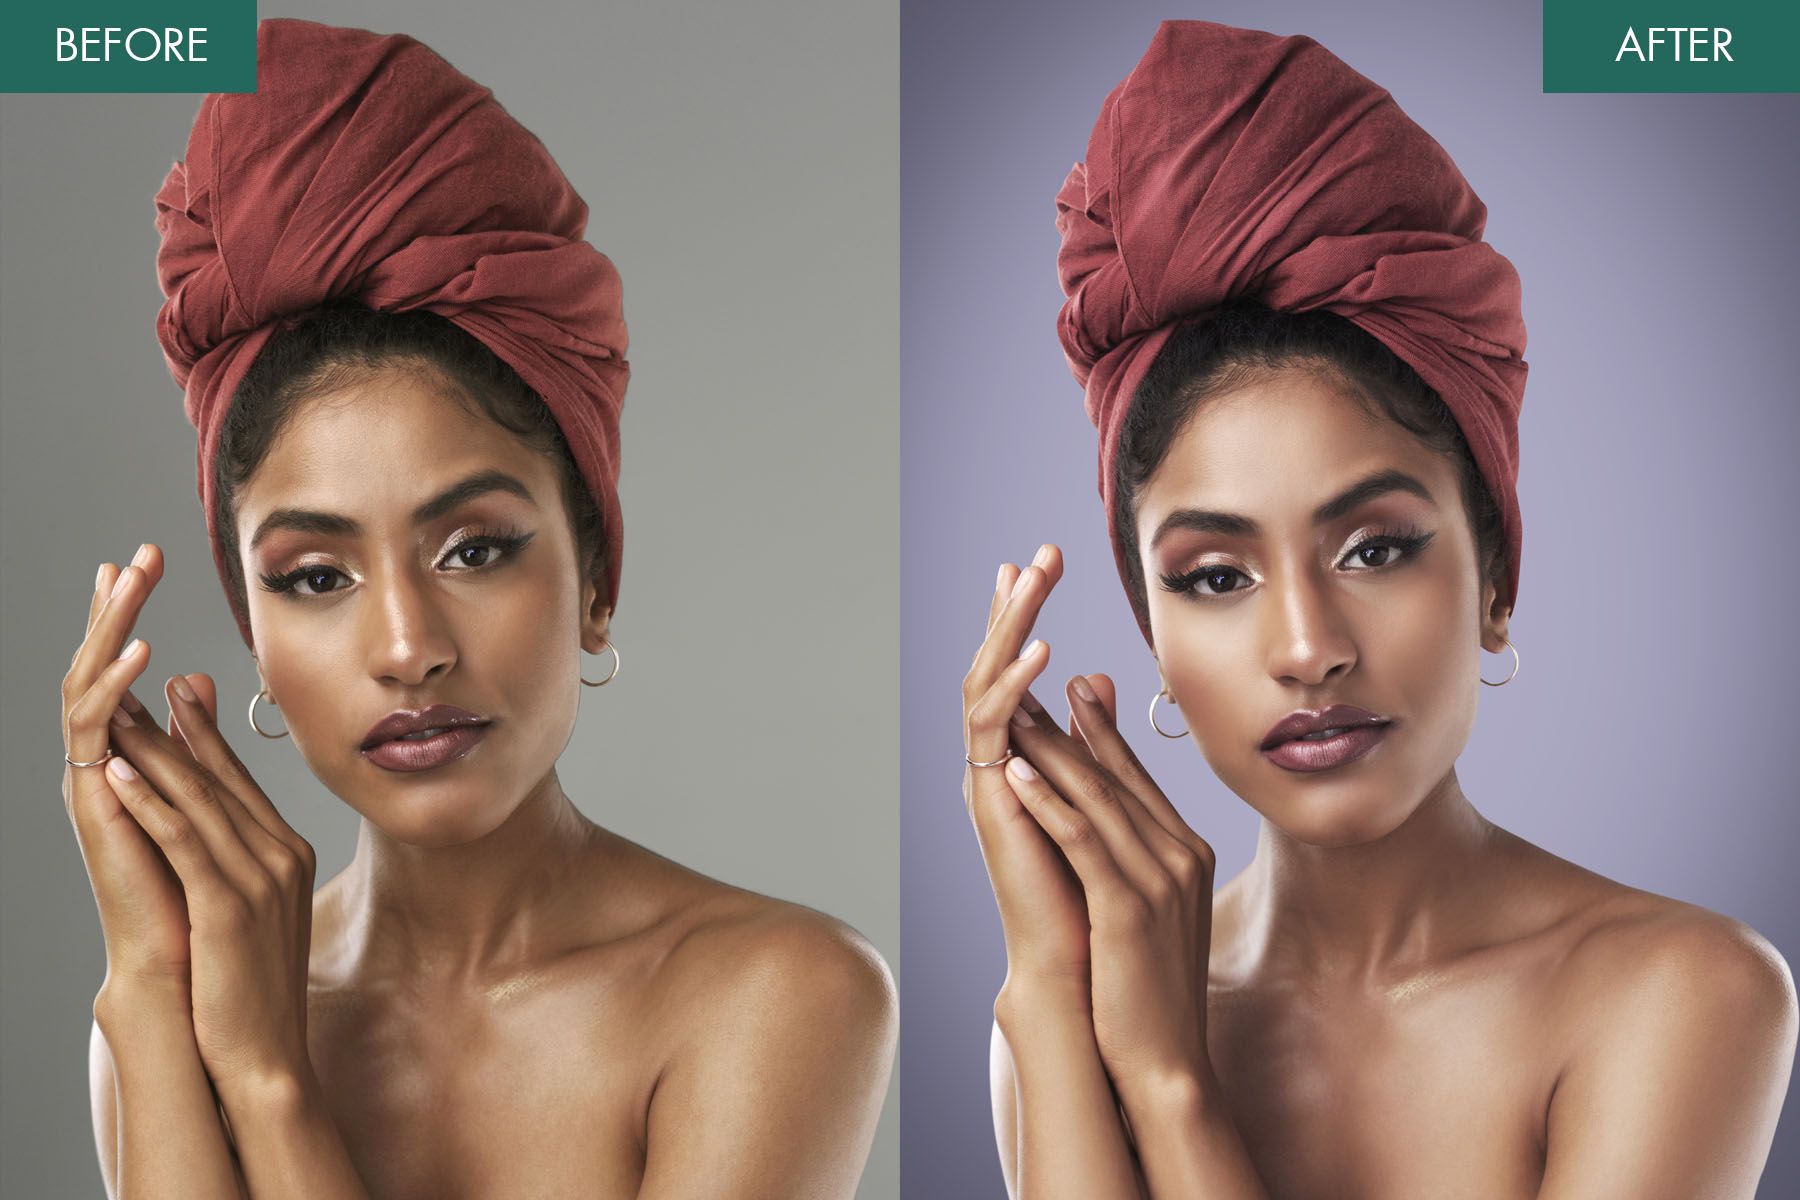
Facetune – For deep portrait edits

- Makeup and hair corrections
- You can test paid modules before buying them
- Excellent portrait retouching
- Precise face and body adjustments
- Subscription model
- Solely focused on portrait editing
People opt for Facetune when they need to improve portrait images. The program was initially developed as a user-friendly instrument for enhancing selfies and portrait shots in a quick way. So, all tools and features available here are aimed at portrait editing.
If you want to get rid of skin imperfections, make your teeth look white, smooth skin, or reshape your face, Facetune has the needed tools. In addition to basic touch-ups, this app lets you get creative by trying out different hair colors, applying makeup, and even changing eye color. So, you can create mind-blowing transformations.
Layout – For creating collages

- Very user-friendly tool
- It is possible to set up nine photos in a layout
- Many layouts
- Seamless integration with Instagram
- Rather limited set of editing tools
Layout is a cool photo app owned by Instagram. It was created for making beautiful collages. Open the app, select the needed photos from your camera roll and place them wherever you like in your collage. It is possible to change the size and position of those images, and even add some filters to give everything a nice, put-together vibe.
This tool is very easy to use, especially if you want to show off several pictures in a neat and attractive way on social media or other sites. Since it’s part of the Instagram family, the Layout app seamlessly integrates Instagram, which is great for people who mainly use Instagram to share their photos.